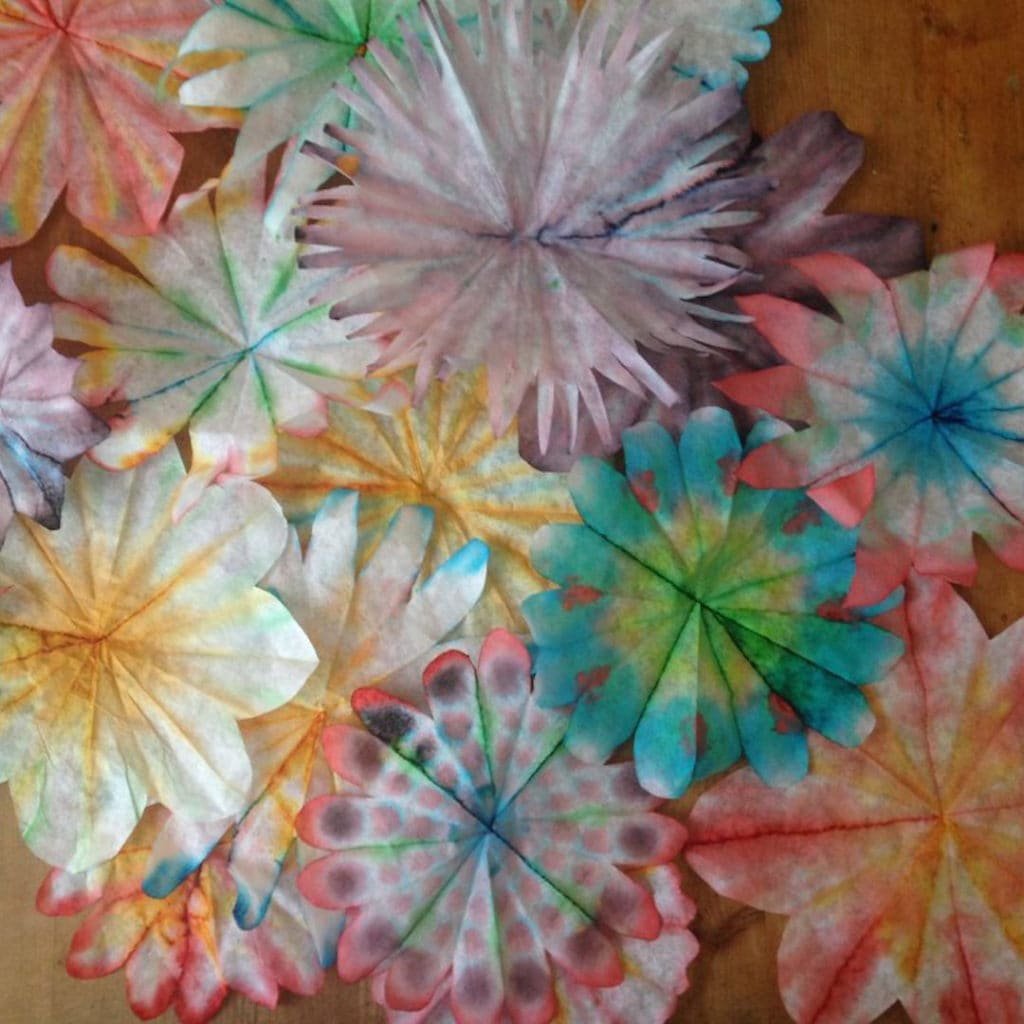
Coffee Filter Flowers are easy to make and very pretty!
Coffee filters are made of a very porous type of paper — porous is an adjective used to describe things that have many tiny holes that allow water and air to pass through them. Rocks, fabric, and papers are a few of the things that can be porous.
Coffee filters have to be porous because the water needs to pass over the ground-up coffee beans, taking away only flavor and color, into the coffee pot below. The same thing happens with rainwater as it flows through many layers of porous rocks and dirt, which slowly filter out little particles until the rainwater reaches underground aquifers, where the water pools inside the earth, purified after many years.
Porous paper is really fun for making water-based color crafts, because we can see the color travel through the porous surfaces. Sometimes we get unexpected results, and we can see mixed colors separate into different colors! For instance, green is made using a combination of the colors yellow and blue, so if you allow green inks to separate on a coffee filter, in some cases you will be able see both the yellow and blue colors pull apart as they travel over the porous surface of the paper.
Materials
- White paper coffee filters
- Food colors*
- Thin floral wire, strong string, or yarn (to attach the blooms to the stems)
- Wax paper, a drop cloth, or some other protective surface to work on
- Sticks, heavy straws, strong wire, or thin dowels (to use for stems)
- Cup of clean water
- Four small containers for holding the colors, and cotton swabs to use as applicators
Instructions
- Set up: pour a couple Tablespoons of water into your four containers, then add a couple drops of food coloring to each.
- Fold your coffee filter in half, then in half again. (You may fold again, if you please!)
- One side of your folded coffee filter will be a point. You must not cut into or cut off this point — this is the center of your future flower, and you must be able to pinch it together to tie it onto the stem. At the other side of your folded coffee filter is the wide, rounded side of the triangle. You will cut points and rounded edges into this side to make petal shapes.
- Cut as many coffee filters as you want.


Adding color (Two Ways)
Now: you may either touch the cotton swabs with color on them directly onto the coffee filters, or you may first use the clean water to wet your coffee filter before adding the color.
If you add the color to dry filters, the color will be more saturated, and will not separate as much. The filters should dry fairly quickly, unless you really put a lot of color on.
If you add the color to wet filters, it takes less color to “travel” over the surface of the paper. The filters will dry much more slowly, and may need to be set on a plate in a sunny window. If you live in a very dry place, the water will evaporate more quickly than if you live in a place with high humidity.

Finishing Up
Let the filters dry completely. Open them up and see your beautiful flowers!

Now, pinch the flower together at the center of each filter and tie it off tightly, using your yarn, string, or floral wire. Make sure you leave long enough ends on your fastening material so you can tie them onto the stems you’ve chosen.


Try putting two or three coffee filters together to make beautiful, multicolored flowers.
Now, give your pretty filter flowers to a friend, to brighten his or her day!


*PARENT PRO-TIP! Go to a store that carries food service supplies (like Smart & Final, Cash & Carry, etc.), to get big bottles of food coloring for about the same price you’d pay for the four-pack of tiny squeeze bottles at a normal grocery store. I got 16 oz. bottles of red, yellow, blue, and green, for about $2.75/each, a quantity that will last roughly three human lifetimes.
Warning: The food coloring WILL stain your clothes, work surfaces, fingers, etc. Make sure you plan and work accordingly.

 Here is a great We All Win game from one of our YogaKids Teachers!