“Sugar-free” Crustless Apple Pie

“Sugar-free” Crustless Apple Pie

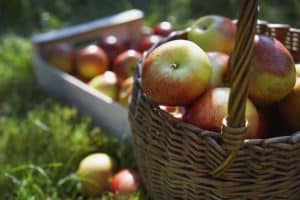
Basket of Apples
Apples in Basket

No sugar, no crust…is this even pie?

I guess it’s not technically pie, but it has all the right flavors and it’s delicious!

Apples have lots and lots of natural sugars, like most fruits. Along with bananas, apples have some of the highest natural sugar content of any fruit. Sometimes apples and apple juice are even used as sweeteners, instead of processed sugar, for organic and natural desserts.

What does processed mean when we’re talking about sugar? The white granular sugar you may see in your home is usually made from these two plants:

Sugar cane is a type of grass that is packed full of natural sugar. Sugar beets are beet plants with very sugary roots. When they are processed, the cloudy brown, sugary juices are squeezed out of the plants by machines. The water from the juice evaporates, and brownish sugar crystals are left over. Sometimes these brown sugar crystals are sold as sweeteners. Sometimes, they are cleaned even more, pulling out all the minerals and vitamins and leftover microscopic bits of plant matter, until it is sparkling and white, leaving only the sugar behind. This is what we call table sugar. It is as pure as sugar gets.

It’s OK to have this type of sugar in moderation, meaning sometimes, and in small quantities. But it’s better for your body if you can enjoy sweets in their natural form, like eating a whole apple or banana.

We’re going to make a delicious apple-pie-like dessert, with only the sweetness of the apples themselves for sugar!

Ingredients:

  • Four large sweet apples, cored, skinned (optional), and sliced thinly. (Try Pink Lady, Gala, Fuji, Jonagold type apples)
  • 1 teaspoon cinnamon
  • 1 teaspoon nutmeg
  • 1/2 teaspoon salt
  • 1 Tablespoon flour or gluten-free flour
  • 1/4 cup water
  • 3 Tablespoons of slightly melted butter or margarine (don’t get it too hot, or it will burn you!) *

Instructions:

Preheat your oven to 350 degrees.

Put all the dry ingredients into a mixing bowl and combine well. Melt the butter in the microwave for 10-15 seconds. Add the apples and toss them into the mixture to lightly cover them with the spices and flour. Now add the water and melted butter, and smoosh it all around with your fingers until all the apples are covered with the spices and flour mixture. Spread everything out evenly in an 8×8″ baking pan and bake for about 40 minutes, stirring the apples every 10-15 minutes.

What you will end up with is an ooey-gooey apple pie filling that you can eat just like it is for a healthy snack or dessert, put on top of ice cream, or add to a bowl of granola. Yum!

* Vegan Option: Replace butter with coconut oil.


“Sugar-free” Crustless Apple Pie

No sugar, no crust…is this even pie?

I guess it’s not technically pie, but it has all the right flavors and it’s delicious!

Apples have lots and lots of natural sugars, like most fruits. Along with bananas, apples have some of the highest natural sugar content of any fruit. Sometimes apples and apple juice are even used as sweeteners, instead of processed sugar, for organic and natural desserts.

What does processed mean when we’re talking about sugar? The white granular sugar you may see in your home is usually made from these two plants:

Sugar beet plant
Sugar cane plant

Sugar cane is a type of grass that is packed full of natural sugar. Sugar beets are beet plants with very sugary roots. When they are processed, the cloudy brown, sugary juices are squeezed out of the plants by machines. The water from the juice evaporates, and brownish sugar crystals are left over. Sometimes these brown sugar crystals are sold as sweeteners. Sometimes, they are cleaned even more, pulling out all the minerals and vitamins and leftover microscopic bits of plant matter, until it is sparkling and white, leaving only the sugar behind. This is what we call table sugar. It is as pure as sugar gets.

It’s OK to have this type of sugar in moderation, meaning sometimes, and in small quantities. But it’s better for your body if you can enjoy sweets in their natural form, like eating a whole apple or banana.

We’re going to make a delicious apple-pie-like dessert, with only the sweetness of the apples themselves for sugar!

Ingredients:

  • Four large sweet apples, cored, skinned (optional), and sliced thinly. (Try Pink Lady, Gala, Fuji, Jonagold type apples)
  • 1 teaspoon cinnamon
  • 1 teaspoon nutmeg
  • 1/2 teaspoon salt
  • 1 Tablespoon flour or gluten-free flour
  • 1/4 cup water
  • 3 Tablespoons of slightly melted butter or margarine (don’t get it too hot, or it will burn you!) *

Instructions:

Preheat your oven to 350 degrees.

Put all the dry ingredients into a mixing bowl and combine well. Melt the butter in the microwave for 10-15 seconds. Add the apples and toss them into the mixture to lightly cover them with the spices and flour. Now add the water and melted butter, and smoosh it all around with your fingers until all the apples are covered with the spices and flour mixture. Spread everything out evenly in an 8×8″ baking pan and bake for about 40 minutes, stirring the apples every 10-15 minutes.

What you will end up with is an ooey-gooey apple pie filling that you can eat just like it is for a healthy snack or dessert, put on top of ice cream, or add to a bowl of granola. Yum!

* Vegan Option: Replace butter with coconut oil.


Ch-ch-ch-chia Fresca & Pudding

Ch-ch-ch-chia Fresca & PuddingChia Seeds

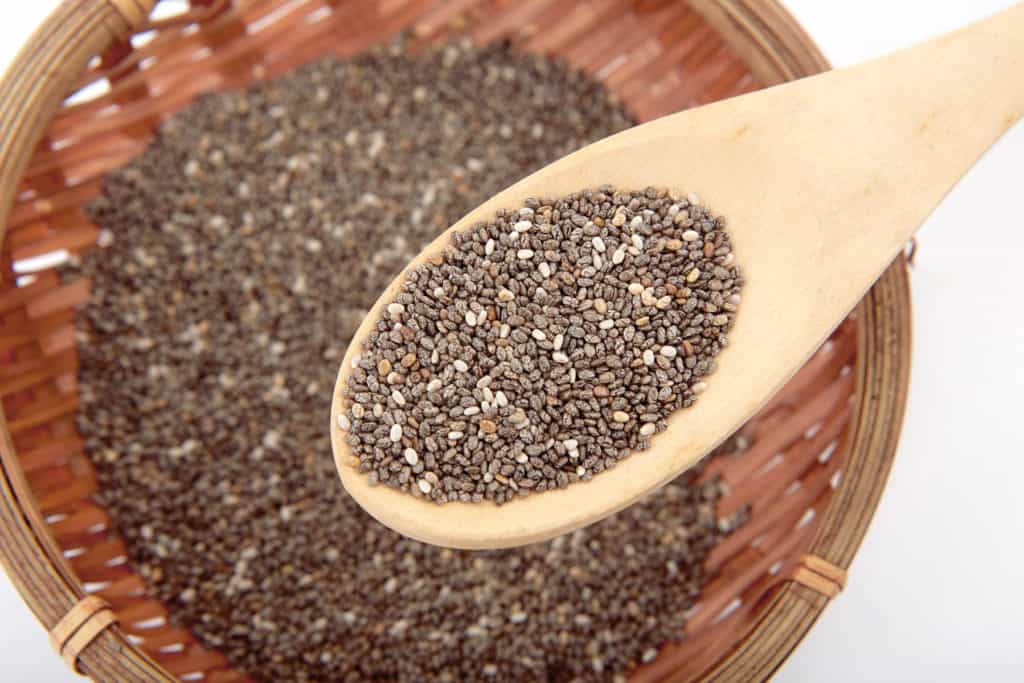
Chia seeds (chia hispanica) are amazing and nutritious. The originate in Mexico, where they have been cultivated for centuries. In fact, Aztec warriors used to carry chia seeds with them when they went into battle, and they were sometimes referred to as “runners food” because, it was said, eating just a small amount of these tiny, lightweight seeds could sustain the scout runners and warriors for an entire day. A chia seed can also hold up to TEN TIMES its weight in water! You’ll see how holding onto so much water gives the shell a slippery gel coating that allows us to make recipes like chia pudding. It also helps YOU stay hydrated (which means you have enough water in your body) because that gel coating of water and electrolytes is released slowly, as they make the journey through your digestive tract.

Today, scientists have discovered that chia is good for: balancing insulin levels and helping prevent diabetes, burning fat and providing loads of essential fatty acids, vitamins, nutrients, and fiber. They’re good for your guts, bones, skin, and brain!

Let’s do some warrior poses and eat some tasty chia treats!

Chia Fresca

In Mexico, chia fresca is made of fruit juices combined with chia to make a gelatinous, cooling drink for summer. It’s typically made with lemonade, but all kinds of juices can be used! Let’s make a pitcher of chia fresca. It’s both filling and light, which makes it a perfect drink-snack for hot summer days.

Chia con Limonada (chia with lemonade)

(Makes one pitcher, or four glasses)

  • 48 oz cool water
  • 4 large lemons
  • 1/4 c of sugar (or sweetened to taste with your favorite sweetener)
  • 2 Tablespoons of dry chia seed

(a single glass)

  • 12 oz water
  • 3 teaspoons lemon juice (about 1 lemon)
  • 1 teaspoon dry chia seed
  • 2 teaspoons sugar (or sweeten to taste with your favorite sweetener)

Note: If you’re using a type of juice that is already sweet or sweetened, you do not need to add any additional sugar

Stir all the ingredients together except the chia and make sure the sugar or sweetener is dissolved in the water. Add the chia seeds and allow the chia drink time to gel in the refrigerator. You will need to wait at least 4-6 hours for the chia to gel. You can make it before you go to bed and leave it to fully gel overnight. This lasts about five days in the fridge (but you’ll probably drink it all up before that!).

Chia Pudding

Chia pudding can be made into lots of flavors, using a variety of ingredients.

What you need, per serving of pudding:

  • 1 cup of a creamy ingredient, like milk, almond milk, coconut milk, etc.
  • 3 Tablespoon of dry chia seeds
  • fruit juice, cocoa powder, or extract (like vanilla extract) for flavoring
  • Sweetener, as needed (Sugar, honey, agave syrup, stevia, etc.)
  • Optional: nuts and cut up, fresh (or frozen) fruit, shredded coconut, flax meal — for extra texture and flavor

You may also like this a little thicker, to make it extra pudding-like; or thinner, so you can drink it. You can add extra chia seeds to thicken it, and fewer chia seeds to make it thinner.

Mix all the ingredients well, and then add the chia seeds and shake or stir them in as much as you can. It’s helpful to put each serving, if possible, into a 1/2 pint jar with a lid so you can shake it up halfway through the gelling process. This keeps the chia seeds from settling to the bottom and clumping into a hard mass. Usually if you can shake it up a few times during the first hour and a half, it won’t clump, even if you leave it to fully gel overnight. I like to make this at bedtime so it’s ready for breakfast!

If you want to blend fresh fruit into your pudding so the whole pudding is flavored (versus using pieces of cut fruit), put all the ingredients into a blender – EXCEPT the chia seeds (this is important; they will not gel if the seed coating is broken) – and puree, adding the chia seeds to the blended mixture right before it gets sent to the fridge.

Follow these basic directions for all the recipes below. Lasts for about 4 days in the fridge.

Chocolate Chia Pudding

  • Coconut milk
  • 1 1/2 T cocoa powder
  • 2 Tablespoons sugar

Horchata Chia Pudding

  • Rice milk
  • 1/2 teaspoon vanilla extract
  • 1/2 tsp ground cinnamon

Vanilla Chia Pudding

  • Any creamy base “milk”
  • A little sweetener
  • 1/2 teaspoon extract

Fruity Chia Pudding

  • Use 1/3 cup of berries (blueberries, strawberries, raspberries), or 1/2 large banana, or 1/4 c fruit juice
  • Use only 3/4 cup of creamy base
  • Sweeten if needed

Use a blender to blend chunky fruits and base mixture together before adding chia and refrigerating.

Be creative! What delicious flavor combinations can you come up with?

Math Medley

Using the one-serving size as your starting point, how much of each of the ingredients would you need to make enough servings for your family? Or for each morning of your school week (five)?

Laughing Language

Since chia fresca is a Mexican creation, can you learn to say all the ingredients of your chia treats in Spanish? Here are a few to get you started:

    • Milk – leche
    • Fruit – frutas
    • Lemon – limón
    • Strawberry – fresa
    • Vanilla – vainilla

What else are you using in your favorite chia recipe?

Ecological Echoes

Chia is one of over 3500 species of plants belong to the mint family — called Lamiaceae. All members of this family of plants have simple leaves that are directly opposite of each other on square stems, with five-petaled flowers that are fused into what looks like a single upper petal and one lower petal. All members of the mint family may not be tasty, but they are all edible. Some other members of the mint family include peppermint, spearmint, basil, lavender, marjoram, rosemary, savory, and thyme. Different types of mint grow all over the world…can you identify any wild mint plants in your local wildlife area?
Ch-ch-ch-chia Fresca & Pudding

Chia seeds (chia hispanica) are amazing and nutritious. The originate in Mexico, where they have been cultivated for centuries. In fact, Aztec warriors used to carry chia seeds with them when they went into battle, and they were sometimes referred to as “runners food” because, it was said, eating just a small amount of these tiny, lightweight seeds could sustain the scout runners and warriors for an entire day. A chia seed can also hold up to TEN TIMES its weight in water! You’ll see how holding onto so much water gives the shell a slippery gel coating that allows us to make recipes like chia pudding. It also helps YOU stay hydrated (which means you have enough water in your body) because that gel coating of water and electrolytes is released slowly, as they make the journey through your digestive tract.

Today, scientists have discovered that chia is good for: balancing insulin levels and helping prevent diabetes, burning fat and providing loads of essential fatty acids, vitamins, nutrients, and fiber. They’re good for your guts, bones, skin, and brain!

Let’s do some warrior poses and eat some tasty chia treats!

Chia Fresca

In Mexico, chia fresca is made of fruit juices combined with chia to make a gelatinous, cooling drink for summer. It’s typically made with lemonade, but all kinds of juices can be used! Let’s make a pitcher of chia fresca. It’s both filling and light, which makes it a perfect drink-snack for hot summer days.

Chia con Limonada (chia with lemonade)

(Makes one pitcher, or four glasses)

  • 48 oz cool water
  • 4 large lemons
  • 1/4 c of sugar (or sweetened to taste with your favorite sweetener)
  • 2 Tablespoons of dry chia seed

(a single glass)

  • 12 oz water
  • 3 teaspoons lemon juice (about 1 lemon)
  • 1 teaspoon dry chia seed
  • 2 teaspoons sugar (or sweeten to taste with your favorite sweetener)

Note: If you’re using a type of juice that is already sweet or sweetened, you do not need to add any additional sugar

Stir all the ingredients together except the chia and make sure the sugar or sweetener is dissolved in the water. Add the chia seeds and allow the chia drink time to gel in the refrigerator. You will need to wait at least 4-6 hours for the chia to gel. You can make it before you go to bed and leave it to fully gel overnight. This lasts about five days in the fridge (but you’ll probably drink it all up before that!).

Chia Pudding

Chia pudding can be made into lots of flavors, using a variety of ingredients.

What you need, per serving of pudding:

  • 1 cup of a creamy ingredient, like milk, almond milk, coconut milk, etc.
  • 3 Tablespoon of dry chia seeds
  • fruit juice, cocoa powder, or extract (like vanilla extract) for flavoring
  • Sweetener, as needed (Sugar, honey, agave syrup, stevia, etc.)
  • Optional: nuts and cut up, fresh (or frozen) fruit, shredded coconut, flax meal — for extra texture and flavor

You may also like this a little thicker, to make it extra pudding-like; or thinner, so you can drink it. You can add extra chia seeds to thicken it, and fewer chia seeds to make it thinner.

Mix all the ingredients well, and then add the chia seeds and shake or stir them in as much as you can. It’s helpful to put each serving, if possible, into a 1/2 pint jar with a lid so you can shake it up halfway through the gelling process. This keeps the chia seeds from settling to the bottom and clumping into a hard mass. Usually if you can shake it up a few times during the first hour and a half, it won’t clump, even if you leave it to fully gel overnight. I like to make this at bedtime so it’s ready for breakfast!

If you want to blend fresh fruit into your pudding so the whole pudding is flavored (versus using pieces of cut fruit), put all the ingredients into a blender – EXCEPT the chia seeds (this is important; they will not gel if the seed coating is broken) – and puree, adding the chia seeds to the blended mixture right before it gets sent to the fridge.

Follow these basic directions for all the recipes below. Lasts for about 4 days in the fridge.

Chocolate Chia Pudding

  • Coconut milk
  • 1 1/2 T cocoa powder
  • 2 Tablespoons sugar

Horchata Chia Pudding

  • Rice milk
  • 1/2 teaspoon vanilla extract
  • 1/2 tsp ground cinnamon

Vanilla Chia Pudding

  • Any creamy base “milk”
  • A little sweetener
  • 1/2 teaspoon extract

Fruity Chia Pudding

  • Use 1/3 cup of berries (blueberries, strawberries, raspberries), or 1/2 large banana, or 1/4 c fruit juice
  • Use only 3/4 cup of creamy base
  • Sweeten if needed

Use a blender to blend chunky fruits and base mixture together before adding chia and refrigerating.

Be creative! What delicious flavor combinations can you come up with?

Math Medley

Using the one-serving size as your starting point, how much of each of the ingredients would you need to make enough servings for your family? Or for each morning of your school week (five)?

Laughing Language

Since chia fresca is a Mexican creation, can you learn to say all the ingredients of your chia treats in Spanish? Here are a few to get you started:

    • Milk – leche
    • Fruit – frutas
    • Lemon – limón
    • Strawberry – fresa
    • Vanilla – vainilla

What else are you using in your favorite chia recipe?

Ecological Echoes

Chia is one of over 3500 species of plants belong to the mint family — called Lamiaceae. All members of this family of plants have simple leaves that are directly opposite of each other on square stems, with five-petaled flowers that are fused into what looks like a single upper petal and one lower petal. All members of the mint family may not be tasty, but they are all edible. Some other members of the mint family include peppermint, spearmint, basil, lavender, marjoram, rosemary, savory, and thyme. Different types of mint grow all over the world…can you identify any wild mint plants in your local wildlife area?

Star-of-David Mini Pizzas

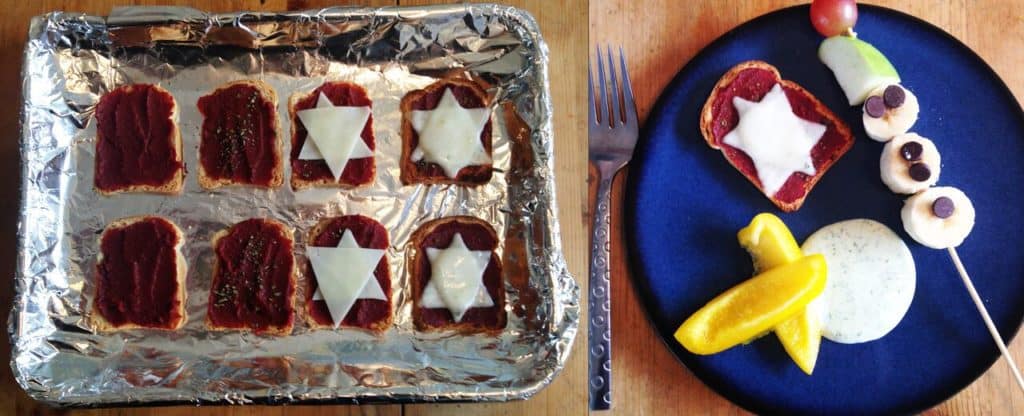
Star-of-David Mini PizzasStar of David Pizza Snack

Total time: 30m

Ingredients:

  • Packaged mini-toasts or big crackers
  • Deli sliced rounds of provolone or other cheese (round works best)
  • Tomato paste or pre-made pasta sauce
  • Fresh or dry oregano

Instructions:

  • Lay out the crackers or toasts on a foil or silicone lined baking tray that can go in your oven or toaster oven. The edges should not touch, and they should be lying completely flat.
  • Spoon a little tomato paste or sauce onto each one and spread it across the top. Don’t make it too thin or the toasts won’t soften in the middle.
  • Sprinkle a pinch of oregano on top of the tomato sauce.
  • Cut the rounds of cheese in half, then each half into three pie-shaped pieces. Slice the curvy edge off the triangle, and lay two triangles on top of each toast in opposite directions, to make a Star of David.
  • Put the tray in the toaster oven or under the broiler just long enough for the cheese to melt a little and form little bubbles; about 5-10 minutes.
  • Serve delicious mini-pizzas and eat ‘em up!

Star-of-David Mini Pizzas

Total time: 30m

Ingredients:

  • Packaged mini-toasts or big crackers
  • Deli sliced rounds of provolone or other cheese (round works best)
  • Tomato paste or pre-made pasta sauce
  • Fresh or dry oregano

Instructions:

  • Lay out the crackers or toasts on a foil or silicone lined baking tray that can go in your oven or toaster oven. The edges should not touch, and they should be lying completely flat.
  • Spoon a little tomato paste or sauce onto each one and spread it across the top. Don’t make it too thin or the toasts won’t soften in the middle.
  • Sprinkle a pinch of oregano on top of the tomato sauce.
  • Cut the rounds of cheese in half, then each half into three pie-shaped pieces. Slice the curvy edge off the triangle, and lay two triangles on top of each toast in opposite directions, to make a Star of David.
  • Put the tray in the toaster oven or under the broiler just long enough for the cheese to melt a little and form little bubbles; about 5-10 minutes.
  • Serve delicious mini-pizzas and eat ‘em up!

Snowman Skewers

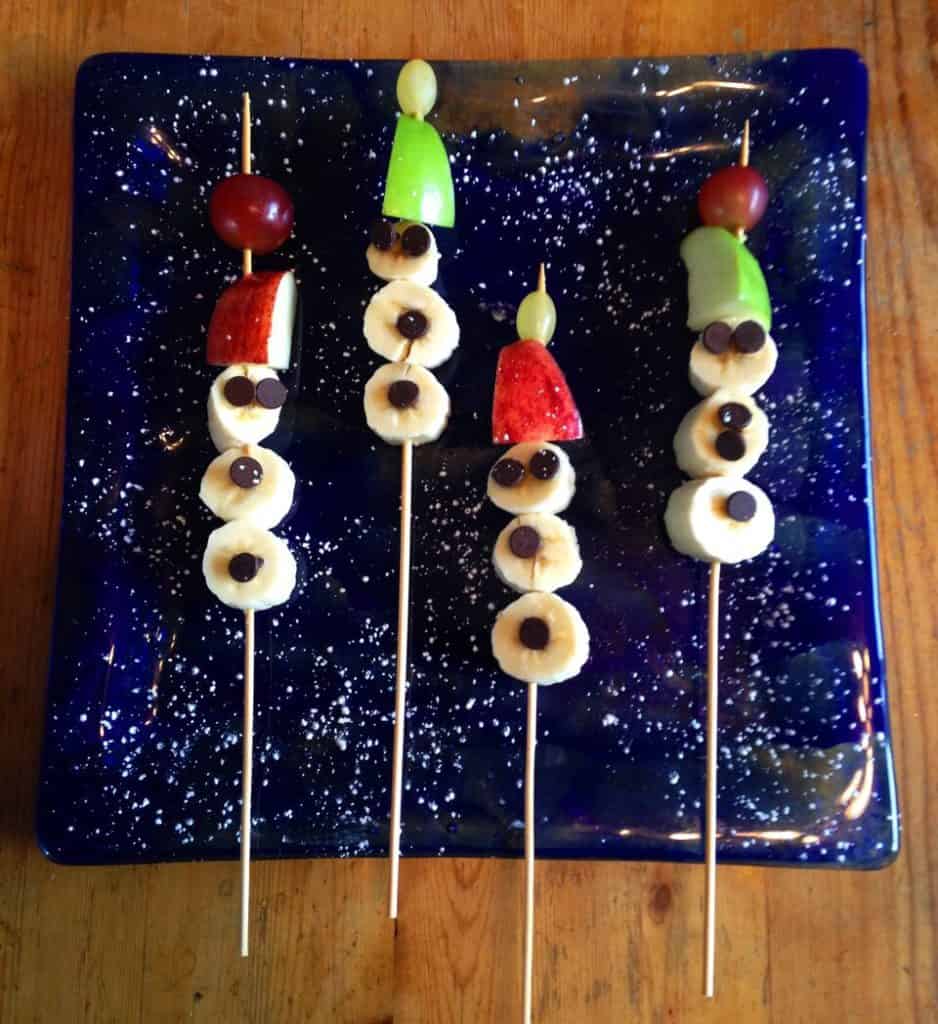
Snowman SkewersSnowman Skewars

Total time: 30m or less

Ingredients:

  • Bananas – each banana makes about two and a half skewers
  • One red and one green apple
  • A few red and green grapes
  • Chocolate chips or raisins (baby-sized chips work best)
  • Wood skewers
  • A flat serving platter or tray
  • Optional: a little bit of powdered sugar to dust serving plate with “snow” – works best when the platter is dark.

Instructions:

  • Cut ¾ – 1” thick slices of banana, put three on each skewer, circular cut side facing outward.
  • Quarter the apples and cut each quarter into thirds. Put on the skewer on top of the bananas – this is the snowman’s hat. Note: You might want to help little kids. It can be tough to get through the skin of the apple with the wood skewer, and we don’t want anyone getting stabbed!
  • Put a grape on the very top, over the apple, to make the hat’s pom-pom.
  • Using the chocolate chips, stick eyes and buttons into the bananas.
  • Optional: lightly dust your serving platter with powdered sugar and lay out all the snowmen.
  • Serve and eat; mmmmmm delicious!

Snowman Skewers

Total time: 30m or less

Ingredients:

  • Bananas – each banana makes about two and a half skewers
  • One red and one green apple
  • A few red and green grapes
  • Chocolate chips or raisins (baby-sized chips work best)
  • Wood skewers
  • A flat serving platter or tray
  • Optional: a little bit of powdered sugar to dust serving plate with “snow” – works best when the platter is dark.

Instructions:

  • Cut ¾ – 1” thick slices of banana, put three on each skewer, circular cut side facing outward.
  • Quarter the apples and cut each quarter into thirds. Put on the skewer on top of the bananas – this is the snowman’s hat. Note: You might want to help little kids. It can be tough to get through the skin of the apple with the wood skewer, and we don’t want anyone getting stabbed!
  • Put a grape on the very top, over the apple, to make the hat’s pom-pom.
  • Using the chocolate chips, stick eyes and buttons into the bananas.
  • Optional: lightly dust your serving platter with powdered sugar and lay out all the snowmen.
  • Serve and eat; mmmmmm delicious!

Pita Holiday Trees

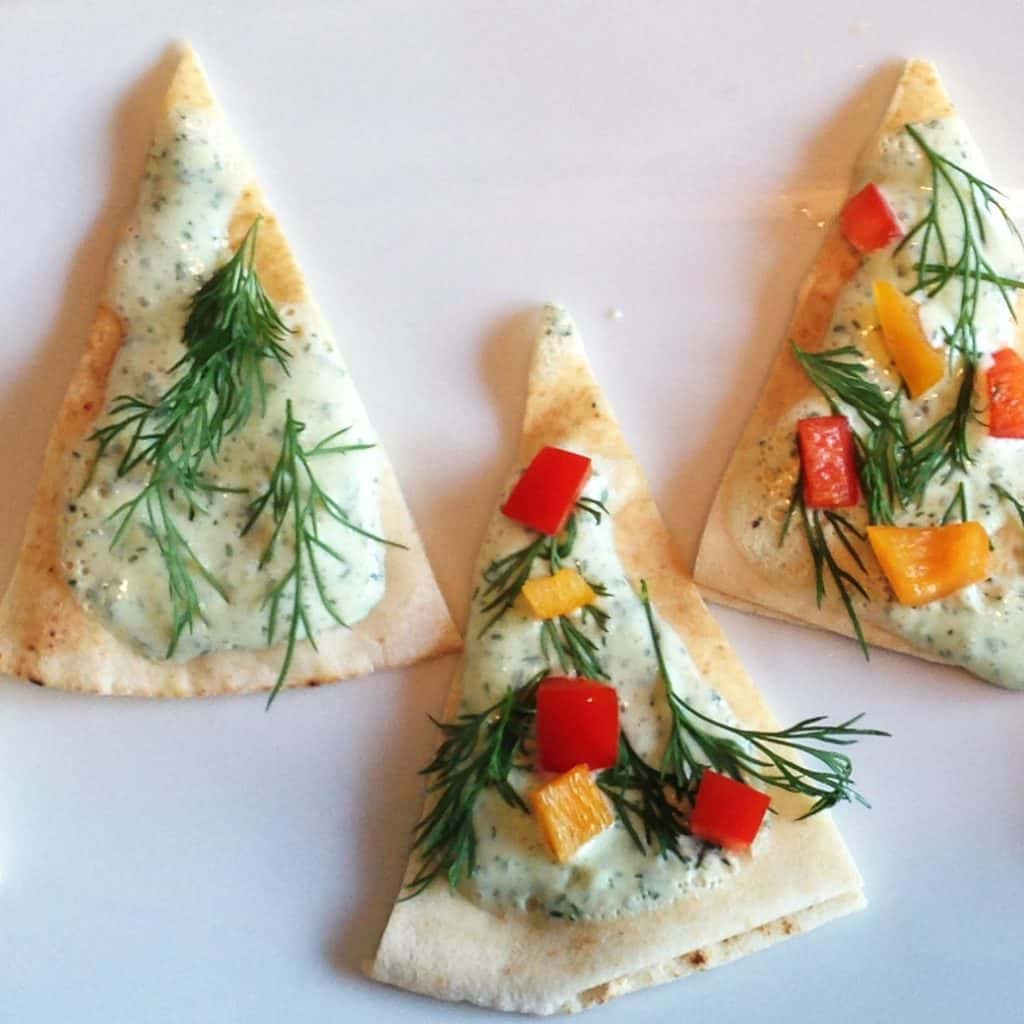
Pita Holiday TreesPita Christmas Tree Snack

Total time: 30m or less

Ingredients:

  • Package of pita bread
  • Green Garden Dip (see next recipe) or other green and white dip – like tzatziki, spinach dip
  • Brightly colored veggies (tiny cherry tomatoes, red, yellow, and green peppers, black olive slices, etc.)
  • Optional: fresh dill

Instructions:

  • Cut each pita round like a pie, into eight triangles, and place on a serving platter, points up.
  • Spoon green dip onto each pita
  • Put little bits of fresh dill on top to look like pine branches
  • Chop the vegetables and decorate the “trees.”
  • Serve and eat! YUM!

Pita Holiday Trees

Total time: 30m or less

Ingredients:

  • Package of pita bread
  • Green Garden Dip (see next recipe) or other green and white dip – like tzatziki, spinach dip
  • Brightly colored veggies (tiny cherry tomatoes, red, yellow, and green peppers, black olive slices, etc.)
  • Optional: fresh dill

Instructions:

  • Cut each pita round like a pie, into eight triangles, and place on a serving platter, points up.
  • Spoon green dip onto each pita
  • Put little bits of fresh dill on top to look like pine branches
  • Chop the vegetables and decorate the “trees.”
  • Serve and eat! YUM!