Orange Pops

popsicleThere is nothing better than a cold popsicle on a hot day!

The only problem is that most popsicles are filled with junk like dyes and artificial flavors. The only way to get around that is to make your own!

All you will need is a gallon of all-natural orange juice, a popsicle mold (found at any grocery store), and a freezer, an ice cave, or simply a very very cold place.

The prep is easy…

  • Pour your orange juice into the mold
  • Place the mold in the freezer
  • Let the juice freeze overnight
  • Enjoy next to a pool or under the sun in your backyard.
  • It is that easy, I promise.

Try this same method with your favorite juice (lemonade, watermelon juice, limeade, the sky is the limit). One of my favorite things to do is add a little coconut milk to the juice mix for a creamy, delicious summer treat.


Pesto Pasta

Pasta is the Italian word for…pasta!  Pasta is a basic staple of Italian cuisine. It refers to noodles of all types, from penne to macaroni, lasagna noodles, bow-pestoties, and more! In this recipe, we will use whatever type of pasta you’d like. Use gluten-free pasta to make this dish gluten-free.

Serves: The whole family!

The shopping list:

  • 1 box of your favorite pasta
  • a big bowl of basil pesto (see basil pesto recipe)
  • 1 tablespoon olive oil
  • 1 handful of parmesan cheese
  • 2 tablespoons of Pine nuts

The prep:

  • Boil Water with several pinches of kosher salt
  • Add pasta after the water is boiling
  • Throw pasta against your refrigerator to see if it sticks — if it does, it is ready! (This will only work with spaghetti or angel hair.. and if you clean up after yourself).
  • Strain pasta into a colander


The fun part:

  • Place pasta back into your pot after it drains
  • Add a generous amount of pesto. Stir with a wooden spoon.
  • Scoop pasta into a serving dish.
  • Garnish with lots of parmesan cheese, a sprinkle of toasted pine nuts and a drizzle of olive oil
  • Enjoy!


Quesadilla

quesadillaThe quesadilla is a dish that originated in Mexico. It is traditionally made by filling a corn tortilla with cheese (and sometimes extra stuff like meat, onions, or other vegetables and herbs), folding it over, and melting it together. You can add whatever you want to your quesadilla!
Quesadilla is pronounced “kay-suh-DEE-yuh.” 

QUESO – “KAY-so” – means “cheese” in Spanish. 


Serves: 1

The shopping list:

  • 3 tablespoons vegetarian refried beans
  • 2 six-eight inch wheat tortillas (or corn, for gluten-free)
  • A handful of shredded cheese

The prep:

  • Spread your refried beans and sprinkle cheese onto one tortilla
  • Place other side of tortilla on top
  • Heat a skillet to medium high and place quesadilla on the hot skillet
  • Cook on each side for about a minute or until cheese is melted

The fun part:

  • Slice into fourths and serve with a side of sliced yummy avocado and salsa
  • Put on a sombrero (hat) and enjoy!


Quesadilla

quesadillaThe quesadilla is a dish that originated in Mexico. It is traditionally made by filling a corn tortilla with cheese (and sometimes extra stuff like meat, onions, or other vegetables and herbs), folding it over, and melting it together. You can add whatever you want to your quesadilla!

Quesadilla is pronounced “kay-suh-DEE-yuh.” 

QUESO – “KAY-so” – means “cheese” in Spanish. 


Serves: 1

The shopping list:

  • 3 tablespoons vegetarian refried beans
  • 2 six-eight inch wheat tortillas (or corn, for gluten-free)
  • A handful of shredded cheese

The prep:

  • Spread your refried beans and sprinkle cheese onto one tortilla
  • Place other side of tortilla on top
  • Heat a skillet to medium high and place quesadilla on the hot skillet
  • Cook on each side for about a minute or until cheese is melted

The fun part:

  • Slice into fourths and serve with a side of sliced yummy avocado and salsa
  • Put on a sombrero (hat) and enjoy!


Fancy Pants Grilled Cheese

This is a fun spin on a standard grilled cheese sandwich.

Yield: 2 sandwiches

grilled cheese

The Shopping List:

  • 4 slices of your favorite whole wheat bread
  • 3 tablespoons of olive oil
  • 2 deli slices of provolone cheese
  • 2 deli slices of fontina cheese
  • 1/3 cup thinly sliced white onion*
  • 1/3 cup store bought roasted red peppers (rinsed,drained,thinly sliced)*

*If you don’t like onions and peppers, you may leave them out, but try adding veggies you do like! I also like to add avocados, fresh spinach and tomatoes into my grilled cheese sandwiches!  You can even use some homemade pesto for extra yumminess. 


The prep:

  • Heat a medium sized skillet on medium/low heat. Add one tablespoon of olive oil
  • When hot, add your thinly sliced white onion
  • Cook onions until they are slightly brown, then add roasted peppers.
  • Cook until peppers are hot then remove from heat
  • Lay 4 pieces of bread onto a cutting board
  • Brush the top of each piece with olive oil
  • In a large pan, apply medium heat
  • When the pan is hot place your bread into the pan olive oil side down
  • Add one slice of cheese to each piece of bread
  • Add your onion and pepper mixture onto two of the pieces of bread
  • Fold bread over to create a sandwich
  • When golden brown and melted on each side, remove from pan


The fun part:

  • Slice sandwiches in half and share with your best friend
  • Enjoy immediately

Fancy Pants Grilled Cheese

Fancy Pants Grilled Cheese

This is a fun spin on a standard grilled cheese sandwich.

Yield: 2 sandwiches

The Shopping List:

  • 4 slices of your favorite whole wheat bread
  • 3 tablespoons of olive oil
  • 2 deli slices of provolone cheese
  • 2 deli slices of fontina cheese
  • 1/3 cup thinly sliced white onion*
  • 1/3 cup store bought roasted red peppers (rinsed,drained,thinly sliced)*

*If you don’t like onions and peppers, you may leave them out, but try adding veggies you do like! I also like to add avocados, fresh spinach and tomatoes into my grilled cheese sandwiches!  You can even use some homemade pesto for extra yumminess. 


The prep:

  • Heat a medium sized skillet on medium/low heat. Add one tablespoon of olive oil
  • When hot, add your thinly sliced white onion
  • Cook onions until they are slightly brown, then add roasted peppers.
  • Cook until peppers are hot then remove from heat
  • Lay 4 pieces of bread onto a cutting board
  • Brush the top of each piece with olive oil
  • In a large pan, apply medium heat
  • When the pan is hot place your bread into the pan olive oil side down
  • Add one slice of cheese to each piece of bread
  • Add your onion and pepper mixture onto two of the pieces of bread
  • Fold bread over to create a sandwich
  • When golden brown and melted on each side, remove from pan


The fun part:

  • Slice sandwiches in half and share with your best friend
  • Enjoy immediately

Basil Pesto Spread

mortar-pestle
mortar and pestle

Pesto is an Italian dish that can be used as a sandwich or cracker spread, pasta sauce, and more. It is SO DELICIOUS. I put it on everything and then have nice garlic-breath.

Pesto comes from the Italian word pestare (peh-STAR-ay), which means to  ‘pound, crush.’ It got its name because, before people had food processors, if they wanted to squish up herbs and spices very small, they would use a mortar and pestle (some people still do!), which looks like the picture on the left.

If you’ve ever been to a Mexican restaurant, you may have seen a mortal and pestle that looks like the one in the picture filled with guacamole. Mortar and pestles are great for smooshing all kinds of things! You can pestare the ingredients for your basil pesto in a mortar and pestle, or you can take a shortcut and use a food processor.


Basil Pesto

Yield: 2 cups

pesto

The Shopping List:

  • 2 cups basil leaves, tightly packed
  • 2 teaspoons of garlic, minced (chopped as small as physically possible)
  • 1/2 cup grated Parmesan cheese
  • 4 tablespoons lightly toasted pine nuts
  • 1 cup of extra virgin olive oil
  • 1 teaspoon kosher salt


The prep:

  • Add all ingredients into blender or food processor with a quarter of your total olive oil
  • Turn blender on (don’t forget the lid… Or to plug it in)
  • Slowly drizzle the remaining olive oil into the blender
  • Blend until all is combined.
  • Taste. Make any adjustments needed.

The fun part:

  • Pour pesto into an airtight container
  • Store In the refrigerator for up to 5 days.
  • Label, ‘don’t eat’ because it is that good, use this pesto on everything!

Basil Pesto Spread

Basil Pesto Spread

Basil
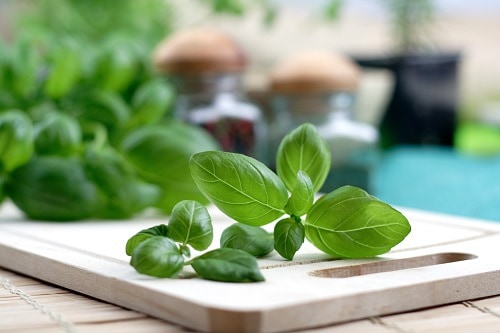
Studio shot of fresh basil

Pesto is an Italian dish that can be used as a sandwich or cracker spread, pasta sauce, and more. It is SO DELICIOUS. I put it on everything and then have nice garlic-breath.

Pesto comes from the Italian word pestare (peh-STAR-ay), which means to  ‘pound, crush.’ It got its name because, before people had food processors, if they wanted to squish up herbs and spices very small, they would use a mortar and pestle (some people still do!), which looks like the picture on the left.

If you’ve ever been to a Mexican restaurant, you may have seen a mortal and pestle that looks like the one in the picture filled with guacamole. Mortar and pestles are great for smooshing all kinds of things! You can pestare the ingredients for your basil pesto in a mortar and pestle, or you can take a shortcut and use a food processor.


Basil Pesto

Yield: 2 cups

The Shopping List:

  • 2 cups basil leaves, tightly packed
  • 2 teaspoons of garlic, minced (chopped as small as physically possible)
  • 1/2 cup grated Parmesan cheese
  • 4 tablespoons lightly toasted pine nuts
  • 1 cup of extra virgin olive oil
  • 1 teaspoon kosher salt


The prep:

  • Add all ingredients into blender or food processor with a quarter of your total olive oil
  • Turn blender on (don’t forget the lid… Or to plug it in)
  • Slowly drizzle the remaining olive oil into the blender
  • Blend until all is combined.
  • Taste. Make any adjustments needed.

The fun part:

  • Pour pesto into an airtight container
  • Store In the refrigerator for up to 5 days.
  • Label, ‘don’t eat’ because it is that good, use this pesto on everything!

Lettuce Wrap

This lettuce wrap is a great way to have a sandwich when you’re out of bread. Plus, I’m pretty sure it’s a well-known scientific fact that food eaten in roll-up form is at least three times as fun as food eaten in flat form.

Did you know: Romaine lettuce is super delicious AND super nutritious! It’s true: romaine ranks higher than spinach and kale on the nutrition scale, has tons of good veggie protein, and has a mild flavor that most people can enjoy.

lettucewrap

Serves: 1

The shopping list:

  • 1 romaine lettuce leaf
  • Your favorite slice of cheese
  • Your favorite assortment of vegetables (sliced thinly)
  • Any meat or meat-substitute you want to add, chopped into very small or thin slices

No prep, only fun!

Use the romaine lettuce just like you would a piece of bread

Add your ingredients and a drizzle of your favorite salad dressing, roll it up, and eat it!


Note to parents: This is a very fun recipe for the kids when they have friends over or for an after school snack. Present an assortment of items buffet style and let them build their own ‘sandwich.’