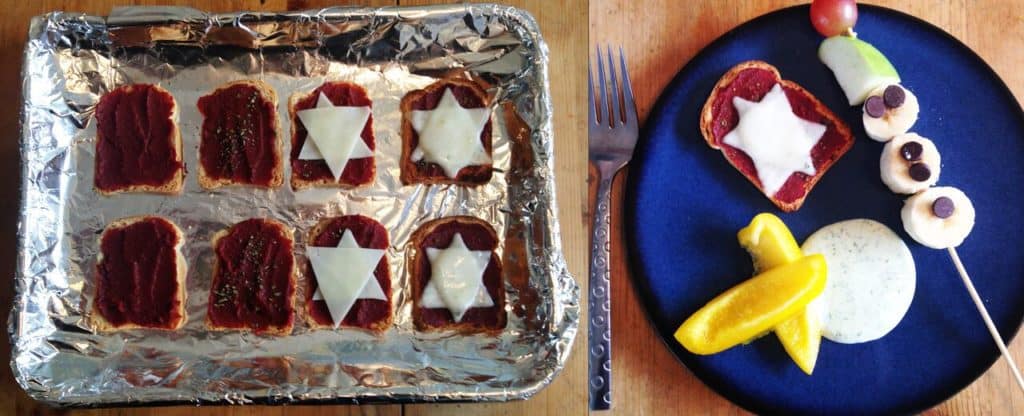
Star-of-David Mini Pizzas

Star-of-David Mini PizzasStar of David Pizza Snack

Total time: 30m

Ingredients:

  • Packaged mini-toasts or big crackers
  • Deli sliced rounds of provolone or other cheese (round works best)
  • Tomato paste or pre-made pasta sauce
  • Fresh or dry oregano

Instructions:

  • Lay out the crackers or toasts on a foil or silicone lined baking tray that can go in your oven or toaster oven. The edges should not touch, and they should be lying completely flat.
  • Spoon a little tomato paste or sauce onto each one and spread it across the top. Don’t make it too thin or the toasts won’t soften in the middle.
  • Sprinkle a pinch of oregano on top of the tomato sauce.
  • Cut the rounds of cheese in half, then each half into three pie-shaped pieces. Slice the curvy edge off the triangle, and lay two triangles on top of each toast in opposite directions, to make a Star of David.
  • Put the tray in the toaster oven or under the broiler just long enough for the cheese to melt a little and form little bubbles; about 5-10 minutes.
  • Serve delicious mini-pizzas and eat ‘em up!

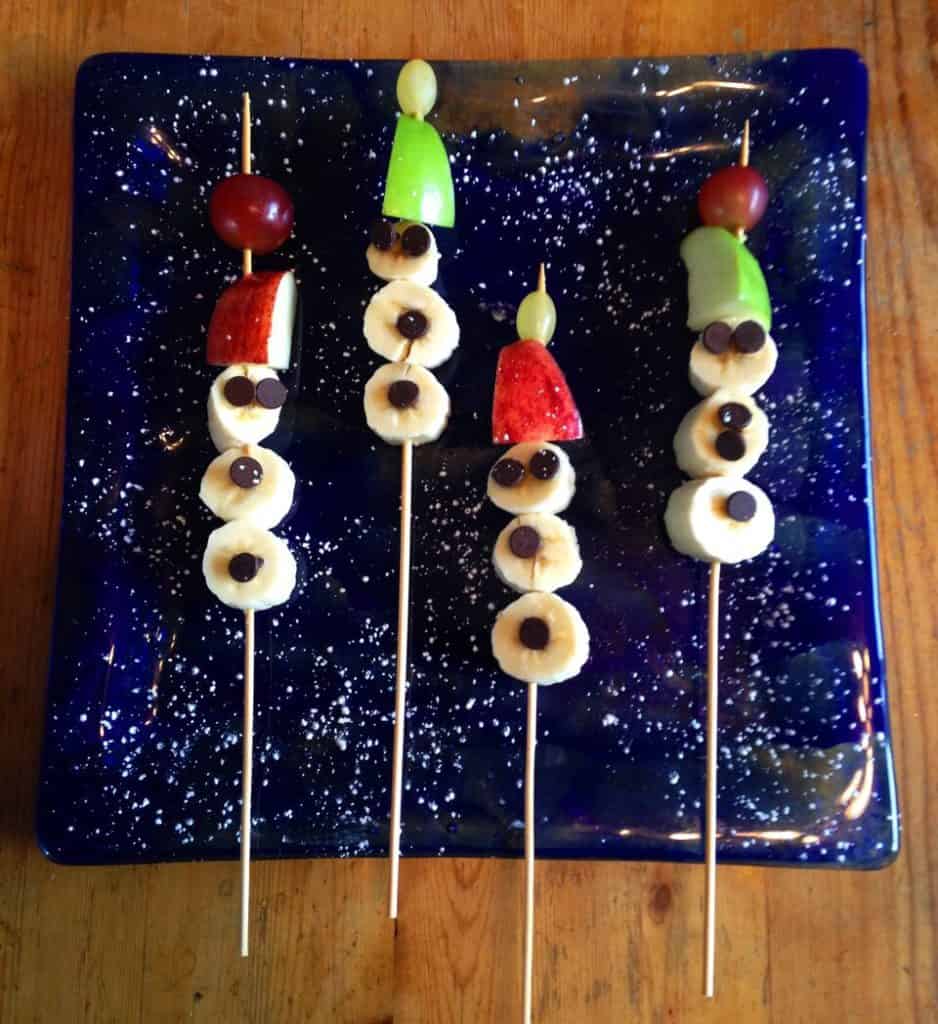
Snowman Skewers

Snowman SkewersSnowman Skewars

Total time: 30m or less

Ingredients:

  • Bananas – each banana makes about two and a half skewers
  • One red and one green apple
  • A few red and green grapes
  • Chocolate chips or raisins (baby-sized chips work best)
  • Wood skewers
  • A flat serving platter or tray
  • Optional: a little bit of powdered sugar to dust serving plate with “snow” – works best when the platter is dark.

Instructions:

  • Cut ¾ – 1” thick slices of banana, put three on each skewer, circular cut side facing outward.
  • Quarter the apples and cut each quarter into thirds. Put on the skewer on top of the bananas – this is the snowman’s hat. Note: You might want to help little kids. It can be tough to get through the skin of the apple with the wood skewer, and we don’t want anyone getting stabbed!
  • Put a grape on the very top, over the apple, to make the hat’s pom-pom.
  • Using the chocolate chips, stick eyes and buttons into the bananas.
  • Optional: lightly dust your serving platter with powdered sugar and lay out all the snowmen.
  • Serve and eat; mmmmmm delicious!

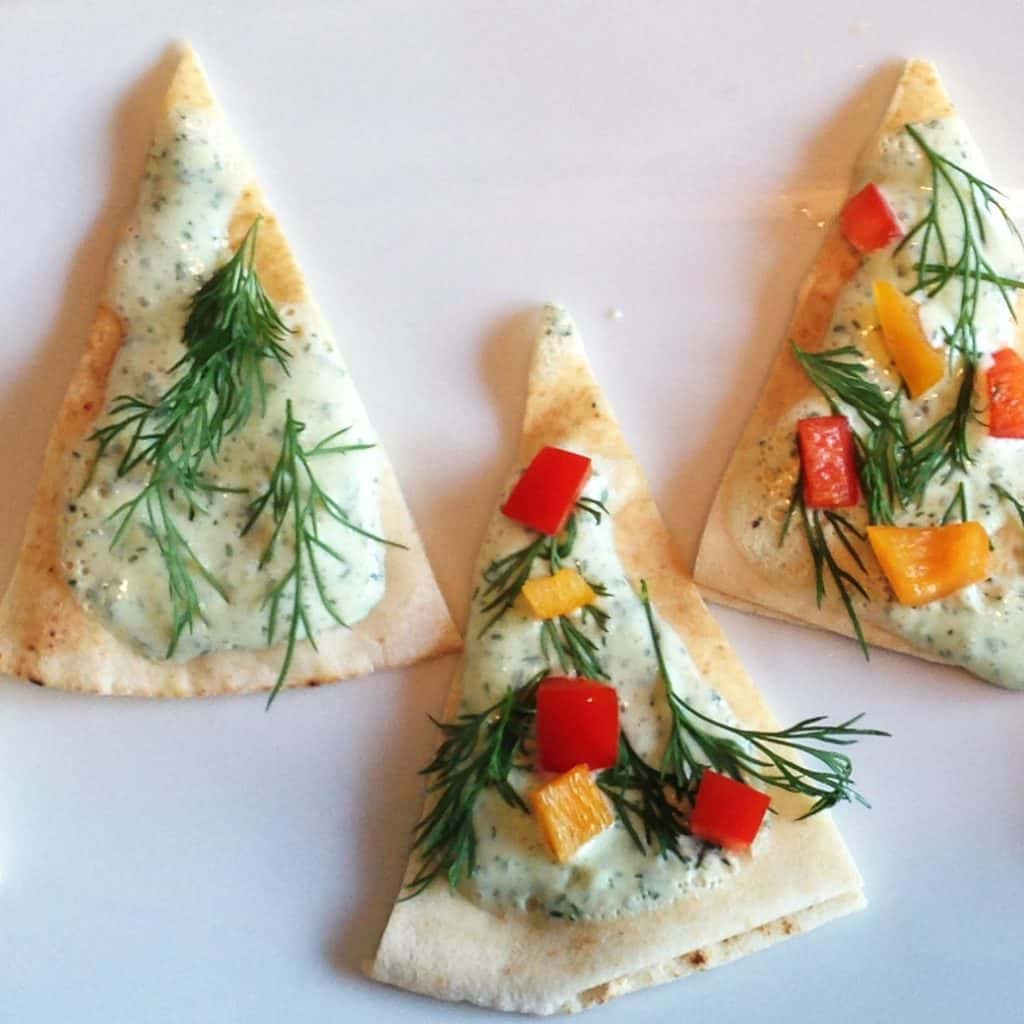
Pita Holiday Trees

Pita Holiday TreesPita Christmas Tree Snack

Total time: 30m or less

Ingredients:

  • Package of pita bread
  • Green Garden Dip (see next recipe) or other green and white dip – like tzatziki, spinach dip
  • Brightly colored veggies (tiny cherry tomatoes, red, yellow, and green peppers, black olive slices, etc.)
  • Optional: fresh dill

Instructions:

  • Cut each pita round like a pie, into eight triangles, and place on a serving platter, points up.
  • Spoon green dip onto each pita
  • Put little bits of fresh dill on top to look like pine branches
  • Chop the vegetables and decorate the “trees.”
  • Serve and eat! YUM!

Green Garden Dip

Total time 20m

Ingredients:

  • Large or mid-size container of Greek yogurt (not single serve)
  • Bundles of fresh leafy green herbs, like: dill, parsley, mint, basil, and tarragon.
  • 2-4 green onions. Use the whole thing, just cut off roots and any brown leaves
  • One clove fresh garlic, or a ½ Tablespoon of powdered garlic
  • ½ Tablespoon sea salt
  • ½ Tablespoon ground black pepper
  • Juice of ½ lemon
  • *optional – 2-3 Persian cucumbers, 1/2lb of spinach, water chestnuts, etc.

Instructions:

I use the two-pound size of Greek yogurt, because this green dip is SO delicious, you’ll want lots left over for veggie dip, sandwiches, dressing…you’ll be evaluating everything in the fridge as a possible vehicle for this yummy green goodness. If you want to make a smaller batch, just scale down until you get the herb-to-yogurt density you like. Drain the extra fluid/whey from the container of yogurt before you start. If you want to make a vegan version of this dressing, you can use coconut yogurt, but you might want to add some chickpeas, soft tofu, white beans, or pureed cashews to thicken the mixture.

Clean and leaf the herbs. Discard the stems or save them for flavoring stock. Chop the cucumbers into slices. Throw all the ingredients in a food processor and blend until herbs are ground small and dip is uniform. The more herbs you add, the thicker the dip will be. If you want to add a little more mass to the dip, throw in a Persian cucumber or two, or perhaps some spinach. If you use water chestnuts, drain well and dice small, and add them after the rest of the mixture is pureed.

The dip may be a little runny when you make it, but will thicken a little once it’s been refrigerated overnight. It’s fine to use right away for the pita trees, though.

Brain Buddies: Mudras

Finger Poses for Learning Readiness

Did you know you can talk to your brain with your fingers? Your fingers have a direct connection to your brain. When you touch your fingers together in special ways they create a circuit, and your nervous system passes the information right up to your brain!
mudra-spiderpushupsHAKINI MUDRA

Imagine what a spider would look like doing push-ups on a mirror. Bring your fingertips together and watch your spider do a few “push ups”. Now just let your fingers rest where they are and take a few quiet breaths.

Whether you take five easy breaths or relax for a few minutes, this brain buddy will help you remember anything at all.

Just ask for the right answer to a quiz or test and see what pops into your mind! This is perfect to do with Eyes Around The Clock for a double-memory-whammy! This simple finger pose reboots and balances the right and left hemispheres of the brain.

It increases the brain’s capacity and is ideal to use for problem solving or brainstorming new concepts.owleyesGYAN MUDRA

Touch the tip of your index fingers and your thumbs together. Make owl eyes. What can you see?

Now turn your hands up and rest them on your knees if you’re sitting. This Brain Buddy will help you concentrate and clear the mind so it’s easy to learn new stuff. You can use it to calm down whenever you’re feeling tense. At home or at school. Just sit down anywhere, bring your fingers together and take several slow deep breaths.

It will be your secret super smart brain builder. It’s also the perfect bedtime buddy if you’re having a hard time falling asleep. Lying in bed bring your fingers together with your arms resting at your sides or across your chest. Breathe slowly and the next thing you know you’ll be waking up from a restful sleep and sweet dreams.peacesign-energybarPUSHAN MUDRA

This Brain Buddy is really fun! It’s great for concentration, memorization, and will improve your mood. It is also a body energizer.

Just ask silently for what you want to do, breathe…and let your brain do the rest. Perfect as a study enhancer.

Right Hand: Join the tips of ring and little finger, and thumb, with your pointer and middle finger standing up. It’s kind of like a peace sign, except that your pointer and middle finger are held together, and not in a V-shape.

Left Hand: Join the tips of middle and ring finger with thumb. Your pointer and pinky fingers will stick up like an energy bar.

The Marvels of Meditation

School can be mega-stressful. New teachers and schedules, the never-ending pile of homework, tons of after-school activities. Add in the social stuff – friends, crushes, and finding the right outfit every morning? So. Overwhelming. Fortunately, we here at YogaKids have a tip to share that can make your life a little easier. And it’s so easy. It’s… doing nothing.

Ok, so technically, it’s not “nothing.” It’s “meditating.” Meditation isn’t just for monks and gurus. It’s for anyone interested in making life come with more joy and ease.

The dictionary defines meditation as “the act of spending time in quiet thought.” It’s been used in yoga and religious practices around the world since ancient times. And there’s a good reason for that. Meditating for just ten minutes twice a day can reap powerful benefits. It can quiet your mind, relax your body, and decrease anxiety. It can improve your relationships, test-taking talents, and even your athletic performance.

Ok – so meditation is great. But how do you do it? You just sit in a comfortable position. You can open your eyes or close them. You can listen to music when you do it, too — as long as it’s quiet and comforting. (And, you know, with no lyrics to guide your thoughts towards that person you’ve been crushin’ on.)

And that’s it. The idea is to clear your mind. That’s impossible to do, of course. We’re all thinking creatures and we can’t just turn off our brains. But that’s ok. Let the thoughts come in your head, acknowledge them, and then let them fly back out. Don’t hang on to them. And – this one is important — don’t judge them.

Oh – and one more thing. Although it sounds super-simple, it can be hard at first. Sitting still and doing nothing? Most people aren’t used to doing that. It can seem boring and lame at first. You’ll probably feel a bit silly too. But give it a try and stick with it for a week.

You might just be amazed at what a bit of nothing can do…

Dia de los Muertos

Feliz Dia de los Muertos —  or “Happy Day of the Dead,” if you are an English-speaker.

Dia de los Muertos is a very important Mexican holiday for remembering loved ones and ancestors who have passed on, and it falls on November 1-2 each year. The holiday is a mixture of indigenous Mexican traditions and the religion of Catholicism, which celebrates All Saints Day on the same date, and was introduced when Spanish conquistadors invaded Mexico many years ago. Though the holiday falls right after Halloween, and the images we see that are related to Dia de los Muertos – like skeletons and skulls – may seem spooky, Dia de los Muertos is not a “scary” holiday. Rather, it is a beautiful tradition of celebration and joy to honor those we love and miss.

On November 1, families honor deceased children and babies, and on the 2nd, they honor adults who have died. Mexican people who celebrate the holiday may build a little altar in their homes to honor the memory of their dead, or they might take a picnic to the cemetery where their family members are buried and spend the night eating, drinking, playing music, and sharing memories of those they have lost. They may also exchange sweets and sugar skulls on the occasion, or leave them on the graves for their deceased friends and family members’ spirits to take back to the afterlife.

Many people associate sugar skulls with Dia de los Muertos. These are actually candies that are shaped like skulls and painted with pretty patterns in icing. Some people paint their faces like sugar skulls. On this Dia de los Muertos, do you have a special person to remember? What are your very favorite memories of those people?

sugarskulls

Sugar Skulls coloring page — digital version (small, jpg) – click to enlarge the image on the left.

Sugar Skulls coloring page — hi-resolution print (large, PDF) – click here for link