Losing Daylight: Help Children Stay Positive During this Season of Change

losing daylight - child playing in fall leaves

It’s finally fall! While the season brings with it exciting things like pumpkin patches, cider, candy apples and Halloween, it also means it’s beginning to get darker outside earlier. Losing daylight has the potential to impact kids and their mental well-being.

The term that accompanies the sadness which corresponds to the change in seasons and loss of sunlight, is Seasonal Affective Disorder. Known as S.A.D. for short, it affects the young more often than the elderly. S.A.D. is identifiable through negative thoughts, an increased amount of time sleeping and isolation once grey skies appear, and can lead to more serious depression.

It’s important for us to help children fight through S.A.D. and find ways to stay positive and motivated throughout fall and winter. If you’re not sure where to start, here are some ways to ensure kids are as happy as possible, no matter the weather outside.

Make Home Cozy

As the weather becomes colder, people spend more time indoors at home. Embracing the seasonal change and making home a comfy haven is one easy way to promote happiness in kids. Having your home be a relaxing place to spend time can have a tremendous impact on a child’s mood. Have plenty of soft blankets around to cuddle under while watching T.V. or having a movie night. With constant adult supervision, light a few candles to create a cozy atmosphere. Check any negativity at the door and ensure you and the kids have a calm space to bask in and forget the weather.

Keep Active

When the weather is dark and grey, it’s easy for kids to feel less motivated. Don’t let that impact the time they spend being active. Activity is not only healthy for their bodies, it’s also beneficial for mental health. Exercise, in any form, helps release endorphins and feel good brain chemicals like serotonin and dopamine to help regulate moods and fight sadness and depression. One great exercise to start is yoga. Combining the physical poses and stretches with the mental focus and meditation, makes yoga a great exercise for children’s happiness.

Aid in Restful Sleep

Sleep is always important, but it becomes even more so when battling sadness and depression. We want to make sure kids are getting the right kind of sleep. This means a good and restful nine to eleven hours per night, depending on age. To help kids accomplish this, make sure they’re comfortable in their beds. This all starts with a good base; your kids mattress should foster a good night’s sleep and benefit the way they like to sleep. Then look to their surroundings. Instead of allowing them to sleep with the T.V. on for noise and light, buy a white noise machine and night light. Listen to what their preferences are and work with them to create it. Beware of oversleeping though, as this is a sign of S.A.D.

Get Creative

When they’re feeling sad, give kids an outlet to express themselves. Children are inherently creative, so giving them the tools to showcase this helps to grow that skill while also teaching them to channel their feelings. Have a dedicated craft box filled with supplies for your child to turn to when they’re feeling sad and need something to uplift them. This also offers the perfect opportunity for you to spend time together working on a project. Having your child explain their craft to you can also give you insight into their feelings so you’re able to understand why they’re sad and think of more ways to help.

Set an Example

You are a child’s biggest role model. In their eyes, you have all the answers and the ability to make anything better. Set an example as the seasons change and show your kids how to be happy. Embrace the fun activities that come along with fall and winter, instead of focusing on the increased grey skies and darkness. Spend more time with them to make them feel less lonely and talk to understand how they’re feeling. Being a positive presence in their lives during this time of year can truly make a difference in the way they view the outside.


Learn more ways to help kids as a Certified YogaKids Teacher!

Halloween Lesson Plan: Celebrate the Spooky Season!

Halloween Lesson Plan

We love Halloween! And kids do too! Don’t let the holiday slip by without celebrating the season! And if you need a Halloween-themed lesson plan  for your kids yoga class to celebrate the spooky season? Look no further! Enjoy a witches’ brew of festive fun in this Halloween Lesson Plan. (And download a coloring page to go with your lesson!)

AGE GROUPS

2-6, 7-11

MATERIALS

  • Music player with fun Halloween music prepared
  • Halloween coloring pages or mini-pumpkins
  • Crayons or supplies for decorating mini-pumpkins
  • Witches hat

SHORT DESCRIPTION/TOPIC

To get the kids excited about Halloween!

MUSICAL MUSINGS

Play fun Halloween music in the background.

CONNECTING CIRCLE

Recite the YogaKids Pledge (or any classroom rules). Introduce the class theme (“Halloween Night in your town”).
Sit in Pretzel and do torso circles right and then left while you sing the Welcome song (sung to the tune of London Bridge is Falling Down):

Welcome to YogaKids
YogaKids… YogaKids
Welcom to YogaKids
We’re so glad you’re here!

Continue with Magic Witch’s Hat Breath – inhale hands in prayer over head, exhale hands to heart. (several rounds)

POSES AS PATHWAYS

Sun Salutation is a way of thanking the sun for coming out every day, for providing us with warmth and light and vitamins D. It gives us healthy bones, allowing us to grow. It allows our food to grow… giving our pumpkins and apples color and vitamins. This dance makes us strong, flexible, alert, and coordinated… and it’s good for the heart!

Sun Salutation – Do any variation of sun salutations you like.

The sun is setting on Halloween night, and we are ready for a night of fun. The moon is bright, and shining down on our Halloween night.

Sunrise Sunset – Sit on your heels. Open and close your wings several times. Then open your wings and interlace your fingers above your head. Stretch your arms up as you lift your buttocks off your heels with an inhalation. Exhale and drop your hips to the right as the arms drop left like the setting sun. Inhale and arch your arms overhead like the rising sun. Then, drop your arms to the right as the hips drop left. Repeat.

We are a witch’s broomstick! Take in a deep breath, and then float around the room on the broom stick blowing out all our air. When all our air is out, our broom turns into a mouse.

Witch’s Broomstick (Mountain) – Stand with your feet together or hip-width apart, whichever is most comfortable. Arms are at your sides, fingers stretching towards the floor. Press your feet into the ground.

Repeat Witch’s Broom to Mouse a few times.

Child’s Pose (Mouse) – Begin in Heel-Sitting pose. Open your knees a little, so your belly relaxes between your thighs. Bend at the hips and fold forward, letting your shoulders drop down away from your ears and spine. Your arms lie back along the sides of your legs with open palms facing upward. Place your forehead on the floor. Turn your head to one side and take a few breaths. Then, turn to the other and do the same.

It is time to make our special Halloween Witch’s Brew. Stand in a wide stance Mountain and begin stirring the pot clockwise then counterclockwise. What will we put into our brew this Halloween? Let’s add some bugs!

Bug Pose or Happy Baby – Lie on your back. Bend your knees into your belly. Open your knees as you grip the outsides of your feet. Bring your needs toward your armpits. Gently rock from side to side.

Stir the pot! Next, let’s add 4 large green lizards…

Lizard – Lie on your belly. Place your hands under your shoulders. Spread your fingers out like lizard claws. Bend your lizard toes forward. Push up until your arms and legs are straight in Plank Pose. Draw your shoulders back and away from your ears. Walk like a lizard, slowly and carefully.

Can you say, “Large Lucky Lizards Land in our Witches Brew?” Stir the pot! Next, we can put in two twisted twigs from an Oak tree…

Tree Pose – Begin in Mountain Pose. Lift one foot and press your foot against the inside of your other leg. You can use your hand to place your foot anywhere between your ankle and inner thigh. Avoid the knee joint. Bring your hands to your chest, palms together in Namaste position. Then raise your arms up above your head. Stretch them out wide, like the branches of a tree. Separate your fingers. Balance and breathe. Now repeat on the other side.

Stir the pot! Now, let’s reach down into our pockets and pluck out two eyeballs and throw them into the brew!

Ball Pose – Have the children roll back and forth on their mats.

Stir the pot! Next, let’s add in the skull of an eagle…

Eagle Pose – Begin in Mountain pose. Lift your right leg and wrap it over your left leg. If you can, hide your right foot and toes behind your left calf. Bring your bent arms up in front of you and place the right elbow on top of your left. Twist together your forearms bringing your palms together. You can also interlace your fingers. Bend your knees. Untangle yourself and change sides, bringing your left leg over your right leg and your left elbow on top of your right.

And a handful of feathers from a wise old owl…

360 Degree Owl – Roll up your yoga mat and turn it into a tree branch. Bend your knees and perch on your branch. Find your balance and sit as upright as you can. Tuck your arms behind you. Gently flap your wings. Turn your head from side to side, opening your eyes wide. Make a gentle “who” sound.

And stir the pot! Now, let’s add two wings of a magic butterfly…

Butterfly – Begin in L-Sitting pose. Bring the bottoms of your feet together, with your heels close to your body and your knees out to each side. Stretch your neck and the top of your head toward the sky and make your spine longer. Place your hands at the sides of your head and stick up your pointer fingers to make antennae. Pull your arms back like they’re your wings. Breathe in and out as you flap your wings forward and back, up and down.

Ask the children if they have anything they want to put in, going around the circle and putting in their ideas with or without doing yoga poses to go along with what they come up with.

And now our last two ingredients… two shells of a snapping turtle!

Turtle – Begin in L-Sitting pose. Open your legs wide. Flex your feet and lift your knees. Place your hands on the floor inside your legs. Spread your fingers wide. Slide your hands and arms under your knees, as far away from each other as possible. Bend forward at the hips and lengthen your chest along the floor. Lift your head and look from side to side. Say “hello” as you stretch your arms and legs as far out as you can. Now, tuck in your chin and retreat retreated into your shell. Pull all of your senses inward and rest. Stay in your shell as you breathe in and out. Repeat.

Turtles have been on the earth for more than 200 million years. Several species of turtles can live to be over 100 years old. The oldest documented turtle lived to be over 200.

Stay sitting with wide legs and stir making big circles in both directions. Then do a Magic Spell together — saying softly at first, then repeating getting louder and louder…. Double, double toil and trouble; fire burn, and cauldron bubble.

Laugh together like witches! HAHAHAHA! Now let’s be a witch’s hat!

Witch’s Hat Pose (Down Diggety Down Dog) – Begin in All Fours pose. Bend your toes forward. Spread your fingers wide. Press your doggy paws and heels downward as you lift your hips and tail to the sky. Lengthen your spine. Stretch your arms and legs as long as possible. Let your head hang down.

Now let’s be a dog howling at the moon!

Up Uppity Doggie Up – Drop your hips and lift your chest forward with an inhalation. Drop your shoulders away from your ears, broaden your chest and keep your arms strong. Keep your legs up from the floor if you can.

Howl at the moon. Go back and forth between Witch’s Hat to Up Dog several times.

Now that all our work is done, let’s take a rest in a pumpkin patch.

Have the kids lie down and take 13 breaths. Expand the belly like a pumpkin It is time for us to celebrate Halloween with some Trick or Treating. Repeat the mantra as the do the pose:

Trick or Treat (clapping feet on floor), Smell My Feet (hands and soles of feet clapping)

Row Row Row Your Boat – Begin in L-Sitting pose and place both hands, palms down, alongside your hips. Lengthen your arms and spine. Lean back and lift your legs up. Balance. Stretch your arms forward, palms up. Breathe in and out. Row your arms forward. Reverse, and row your arms backward.

If you have time, play the Yoga Freeze and Flow Game. When the music stops, take turns having each child wear the Witch’s hat and teach a yoga pose to the group.

Sunrise/Sunset – Same as before!

The sun is setting on our spooky Halloween night, time for us to sleep…

Twist and Blow – Lie on your back with your knees bent. Stretch your arms out to each side, in line with your shoulders, palms up. Drop your bent knees over to the right and up towards your armpit. Turn your head to the left as you breathe out. Breathe in and bring your knees back to the center and across your belly. Drop your legs to the left side, turn your head to the right, and breathe out. Do several continuous rounds. Then, relax for at least a minute with your knees on one side and head rotated in the opposite direction. Change sides and relax again. Then relax for at least a minute on each side.

SAVASANA

VISUAL VIGNETTE

Have the children color a Halloween coloring page, or decorate mini-pumpkins. You can download one here! coloring page.


Learn to write and teach your own Halloween lesson plans with YogaKids!

Rock Your Chakras Halloween Style!

black cat with pumpkin

Need a Halloween-themed class for your older students? This is a Halloween twist on a chakra lesson plan. Having knowledge about your chakras gives you a guide on how to interpret the experiences in your body. Listening to your body and directing your energy within in a conscience way so you feel safe, creative, empowered, loved, heard, connected and spiritual.

AGE GROUP

7-11

MATERIALS

  • One hollowed-out pumpkin
  • Cooked spaghetti
  • Gummy candy
  • Fangs
  • Cyclops eyes
  • Scarves
  • White 8.5 x 11 paper
  • Markers the colors of the chakras
  • Pencils
  • Wet wipes
  • Cotton balls
  • Clothespins
  • Cedar and lavender oil
  • Green marker
  • Music player and prepared music
  • Blocks

DISCUSSION POINTS

What are chakras? Why do we care about chakras? Where is each chakra located in the body? What are some things associated with each chakra (i.e.: color, sense, emotion, etc.)?

CONNECTING CIRCLE

Place a skeleton in the center of the circle.

Take a moment close your eyes and sit tall on your sit bones. Think about your spine. <Pause.> Look at the skeleton in the center of the circle. There are 33 bones in your spine and 5 sections. The cervical spine is your neck, thoracic is where the ribs attach to the spine, lumbar is lower back and sacral is where your spine attaches to your pelvis and then the tailbone region. When one of those bones becomes misaligned, we feel discomfort.

So, alignment of our spine is essential to our health. We have wheels of energy along our spine called chakras. Energy is what makes all things exist and move. Our body receives energy from the sun, food we eat and the air we breathe, and that energy is sent throughout the whole body. Our chakras are those places where that energy comes into the body and is then sent throughout the body. We want to keep these wheels of energy spinning and balanced so that you feel good, much like spinal alignment. Yoga poses can help keep our spines aligned and our chakras balanced.

Name Game – Go around the circle, say your name and an adjective that is scary that begins with the same letter as your name: Howling Heather. Say all together after each child says their name.

POSES AS PATHWAYS

Sunlight is absorbed through our skin, so we can produce Vitamin D, which in turn allows us to absorb calcium. Calcium strengthens our bones.

Sunrise/Sunset – Sit on your heels. Open and close your wings several times. Then open your wings and interlace your fingers above your head. Stretch your arms up as you lift your buttocks off your heels with an inhalation. Exhale and drop your hips to the right as the arms drop left like the setting sun. Inhale and arch your arms overhead like the rising sun. Then, drop your arms to the right as the hips drop left.

Pull your hands around your face to make it dark. Darkness is scary. Your sight is limited, and you might hear things you wouldn’t hear during the day because the world is quiet. Our first chakra’s sense is smell. Pass around a cotton ball held in a clothespin with cedar oil on it, The essence of our first chakra is meeting our basic needs; feeling stable and secure in our environment. 

Polar Bear – Begin in Heel-Sitting pose. Open your knees wide apart, toes touching behind you. Bend forward at the hips and slide your chest along the floor. Place your chin on the floor and put your paws over your nose to keep yourself warm. Breathe in and out.

We are going to be the moon rising. Make wide arms circles to draw the face of the full moon. Moonlight is sun reflected off the surface of the moon. 

Volcano – Begin in Mountain pose. Bring your fingertips together at the chest. Jump your feet apart. Place your palms together at the center of your body in Namaste Position. Breathe in. Watch your hands as you raise them over your head. Breathe out as you explode your arms outward. Lower them to your sides and return your hands to Namaste. Erupt and release again and again. Make big, exploding volcano noises. Jump your feet back together when you’ve finished erupting.

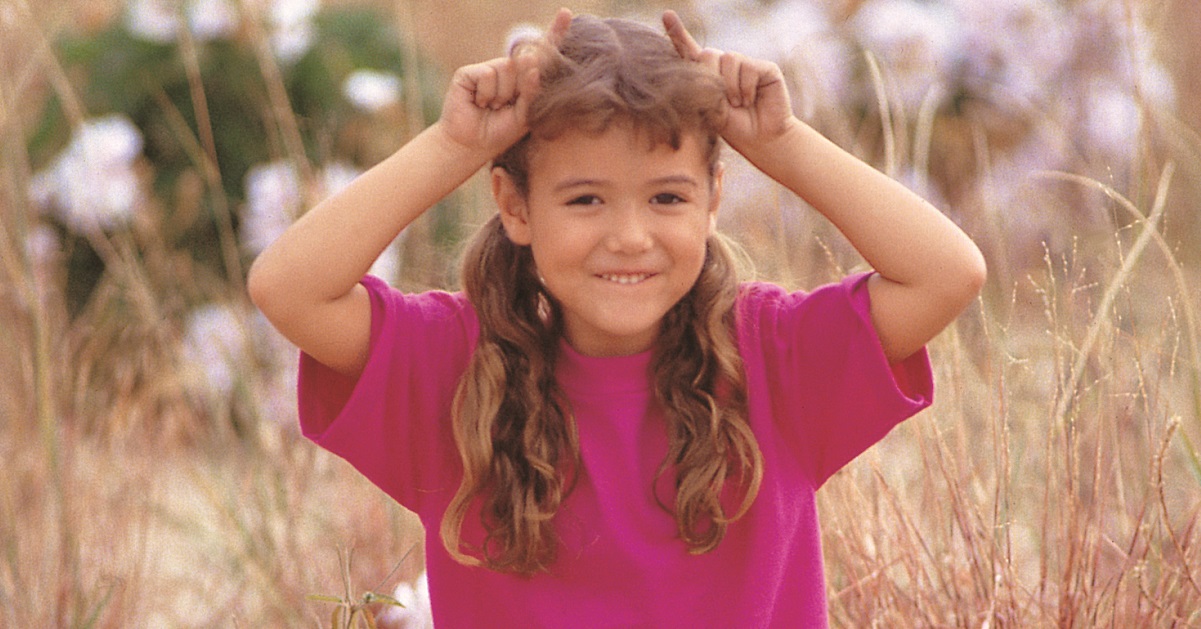
What comes out when the moon is full? WEREWOLVES!

Play Thriller by Michael Jackson. Howl at the moon.

Transformer Series (modified to become Werewolves) – A vinyasa is a flow of poses linked together through breath and movement. In YogaKids, we call vinyasa flows “transformers.” This example of a Transformer Series transitions through the following poses: Lunge, Lizard, S is for Snake, Down Diggety Doggy Down, and back into Lunge.

When our root chakra is balanced, we feel centered and grounded. “I am rooted to the Earth, I am Safe.” 

Mountain – Stand with your feet together or hip-width apart, whichever is most comfortable. Arms are at your sides, fingers stretching towards the floor. Press your feet into the ground. This downward action through the legs allows the torso, neck, and head to rise like a mountain above the clouds. Notice how tall and light you feel.

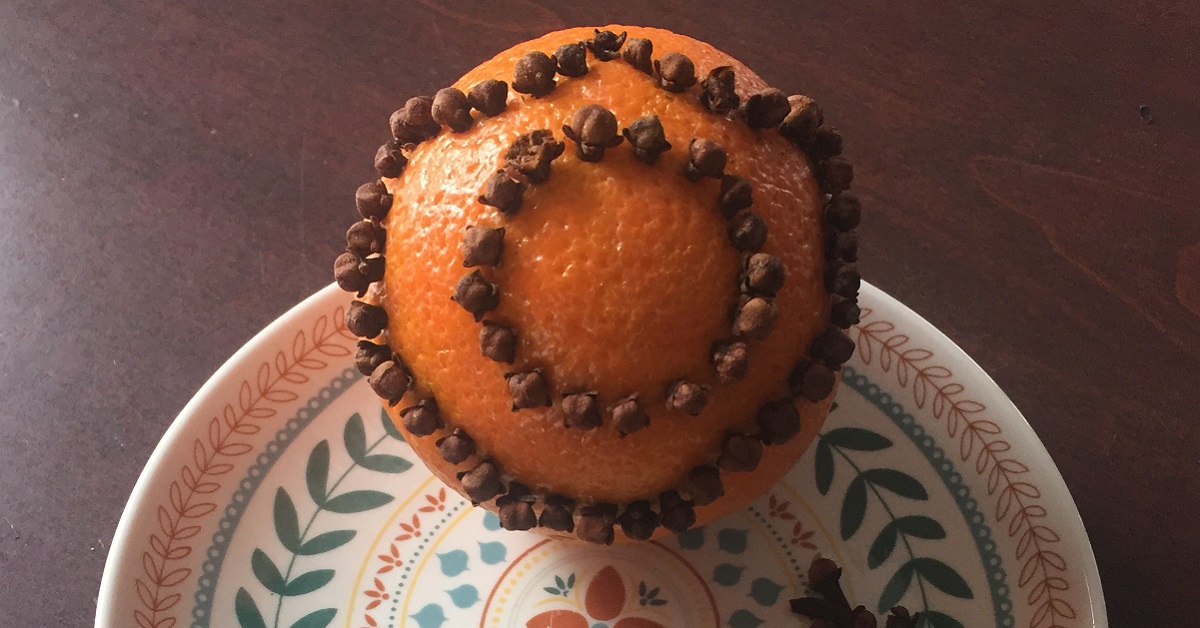
Put your hands on either side of your hips and you can feel the ilium bones that make up your pelvis, which is like a bowl. These bones connect to your spine at the sacrum which is a large triangular bone that helps support the weight of our upper body. This is also where our second or sacral chakra is housed which enhances your ability to feel. When it is in alignment your creative energy flows. Orange represents this chakra. Let’s become pumpkins.

Pelvic Bowling – The pelvis is like a bowl, holding the reproductive and abdominal organs. Tip your bowl forward and backward several times. Now realign and lengthen your spine as you return to center. Feel your legs strong and supportive. Feel your pelvic bowl sitting on the pedestal of the legs, supporting the upward mobility of your torso. Stand tall and walk without spilling anything out of your bowl.

Close your eyes and imagine yourself as an orange pumpkin. Make a scary mouth with fangs and everyone reveal their scary face at once by opening their eyes. Do the Darth Vader breath: Try to inhale/exhale through your nose even though your mouth is open. Use your tongue to stopper your teeth. Count to three on inhale, five on exhale. 

Squat & Breath – Stand with your feet hip-distance apart. Bend your knees and squat down. If possible, bring your heels to the ground and keep your feet parallel to one another. Bring your hands into the Namaste position, with your thumbs lifting the breastbone and your elbows opening your inner thighs. Drop your shoulders away from your ears and keep the torso upright. Breathe deeply and quietly as you balance. Continue to increase the duration of time you can squat and breathe.

Sing the following as you do the pose:

Five little pumpkins sitting on a gate,
the first one said, “oh my its getting late,”
the second one said, “there are witches in the air,”
the third one said, “but I don’t care,”
the fourth one said, “I’m ready for some fun,”
the fifth one said, “let’s run and run and run.”
Woo went the wind and out went the lights and
the 5 little pumpkins rolled out of sight.

Rock ‘n Roll – Sit cross-legged. Take hold of your toes from the outer side of your knees. Breathe in and lift up your chest. Breathe out and tuck in your chin. Breathe in and out. Rock your back and roll backwards. Extend your crossed legs over your head. Roll forward, tuck in your legs, and sit up again. Do this a few times to loosen up your spine, back and legs. Re-cross your legs the other way, then roll a few more times.

A pumpkin is in the shape of our pelvis and where our guts are. If you are brave enough to reach inside without looking, there are some prizes. Pass around a carved-out pumpkin that has “guts” (cooked spaghetti) inside. Within the guts, put in gummy organ shaped candy and eyeballs. Share this folktale:

There is an Irish folktale of how Jack-o-lanterns came to be a Halloween tradition. A man named Stingy Jack invited the devil to have a drink with him. But Jack being stingy didn’t want to pay for his drink, so he convinced the Devil to turn himself into a coin that Jack could use to buy their drinks. Once the Devil did so, Jack decided to keep the coin, and put it into his pocket next to a silver cross, which prevented the Devil from changing back into his original form.

Jack eventually freed the Devil, under the condition that he would not bother Jack for one year and that, should Jack die, he would not claim his soul. The next year, Jack again tricked the Devil into climbing into a tree to pick a piece of fruit. While he was up in the tree, Jack carved a sign of the cross into the tree’s bark so that the Devil could not come down until the Devil promised Jack not to bother him for another 10 years. Soon after, Jack died.

As the legend goes, God wouldn’t allow such an unsavory figure into heaven. The Devil, upset by Jack’s trickery but keeping his word not to claim is soul, wouldn’t let Jack into Hell. He sent Jack off into the dark night with only a burning coal to light his way. Jack put the coal into a carved out turnip and has been roaming the Earth ever since. The Irish refer to this ghostly figure as “Jack of the Lantern” which became simply Jack-o-Lantern. When the Irish brought the tradition to America, home of the pumpkin, they adopted this fruit for their carving activities. 

Row your Boat – Begin in L-Sitting pose and place both hands, palms down, alongside your hips. Lengthen your arms and spine. Lean back and lift your legs up. Balance. Stretch your arms forward, palms up. Breathe in and out. Row your arms forward. Reverse, and row your arms backward. Try the pose while singing “Row, Row, Row Your Boat.” Our navel chakra is our power center which fuels your will to act. Let’s hold hands in this pose as we work to recharge and reconnect with this energy center.

Feel the energy that flows in your body. See if you can connect to your neighbors’ energy like an electric current that flows from one to another. 

Electric Circle – This pose is done with at least three people. Sit cross-legged with your hands on your knees. The left-hand rests palm up, and the right-hand rests palm-down. Breathe deeply into your heart space at the center of your chest. Feel the breath move across your chest, flow down your arms and into the hands that you are holding. You might feel or hear tingling. Whenever you feel this electricity, gently squeeze the hands you are holding. That is the signal to let each other know that the circuit has been made and the current is flowing. With your lips closed and your tongue curled upward to touch the roof of your mouth, start humming or buzzing to imitate the sound of electricity. Get louder and louder, then break the circuit by letting go of each other’s hands. Sit quiet and listen to the silence.

Electricity has transformed us into Frankenstein! Play Monster Mash. Try to walk with arms and legs straight like Frankenstein. Try to cross one leg over the other as you step sideways. Go in both directions.

Ankle/Heel/Toe/Walking – Put on your favorite music or make your own. Lift your toes in the air and walk on your heels. Then, lift your heels and walk high on your tiptoes. Balance on the inside edges of your feet and walk around. Balance on the outside edges and walk around.

When your navel chakra is balanced you feel confident and courageous in your decisions.

Warrior Series with Affirmations – Begin in Mountain pose. Step one leg back while bending your front leg. Keep your hips facing frontward as you raise your arms straight above your head. Say, “I am bold!” From Bold Warrior, turn your back foot slightly outward and bring your arms down parallel to the floor. Keep your front knee bent directly over your ankle. Say, “I am brave.” From Brave Warrior, shift your weight onto your front leg. Pick up your back leg and stretch it behind you. Keep both legs as straight and strong as possible. Stretch your arms forward and say, “My own power I can hold!” Repeat on the other side.

Our spine isn’t straight, it is curved like an S so it can better support the weight of your upper body. Convex is the shape of our cervical and lumbar areas and concave is the shape of our thoracic region We are going to make those two shapes with our back: stretch our chest muscles by opening our arms wide and arching back: then stretch the back muscles by bringing our arms to the front and rounding back. A good way to remember it, concave has the word cave in it and when you cave in, you cave inward. 

Draw a heart with washable green marker on hands of child and dab some lavender oil in center. Our heart chakra fuels our ability to give and receive love.

When we take our heads below our hearts we bathe our brain in oxygenated blood. 

Did someone say BLOOD! (Put your fangs in for Dracula.) Make the shape of Dracula’s cape. When our heart chakra is open and balanced, you feel a deep sense of love, gratitude and connection to all beings, including yourself.

Standing Partner Stretch – With a partner, stand back-to-back in Mountain pose. Both partners take one “baby step” forward. Reach back and take hold of each other’s hands or wrists. Keep your feet rooted to the floor. Lean gently away from each other, as you stretch your chests and shoulders. Come back to center and release your hands.

Dracula is transforming into a bat to fly away. This pose strengthens your arms and core. 

Crow Pose – Begin in Mountain pose. Bend your knees and squat down. Place your arms to the inside of your bent legs and press your hands with outstretched fingers into the floor. Lean slightly forward. Bend your elbows to make a shelf for your knees. Lean forward and balance with your feet off the floor. With patience and practice, you can increase the time you can stay balanced.

We are going to Hiss (tongue behind two front teeth) like a mad black cat (Moo pose) and Purr (as you breath air out of your mouth, flutter your tongue against the roof of your mouth) like we are happy. (Meow pose) 

Moo/Meow – Begin in All Fours Pose. Line up your wrists under your shoulders. Spread your fingers wide and arch your spine to the sky. Loosen your neck and drop your head down. Breathe out long as you meow. Now lift your chest forward and look up with big cow eyes. Dip your belly down and tilt your sitting bones up. Your back will sink down like a cow’s. Make cow lips and moo deeply from the back of your throat. Go back and forth, meowing and mooing.

Zig Zag Breathing – Lay your head down on your friend’s belly pillow. Have someone use your belly as a belly pillow too. Make body zigzags on the floor as everyone breathes from their bellies. Close your eyes and relax. Feel your belly rise and fall with the weight of your friend’s head.

Our throat chakra is the energy center for sound and communication. Everyone wants to be heard. We make sounds in the front and back of our mouths. 

Play with tongue twisters.

  • If two big black cats could blow bubbles, how big of bubbles would big black cats blow.
  • Ghostly ghouls gather gleefully to golf on ghostly green golf courses.

Put cyclops eyes on everyone’s forehead while lying down.

Play Ghostbusters by Ray Parker Jr. Musical Musings

Channel energy through our third eye chakra. This is our center for intuition and insight. Seeing and color represent this chakra. Give each child as a scarf and everyone will work together to keep the scarves in the air. It doesn’t matter whose scarf you rescue. Keep an eye out so you don’t run into someone!

Throw and Grab – Use two or more light objects like scarves. Toss them in the air laterally and try to catch them. Next toss them up laterally but reach across and catch them with your opposite hands. Notice when you add the words, ‘Throw. Throw. Grab. Grab,” it makes this mid-line movement and cross-lateral coordination easier.

These eye exercises will stimulate our Corpus Collosum, the connection between the two halves or hemispheres of our brain. 

Eyes Around the Clock – Use this technique anytime you need to soothe and rest your eyes. Take any seated position. Rub your hands together until they feel hot, then place the palms of your hands over your eyes. Let them soak up the heat. Keep your fingers close together so no light comes through. You can keep your eyes closed or open. Imagine a clock hanging in front of your eyes. Move your eyes to each position around the clock like this:

  1. Look up and down, from twelve o’clock to six o’clock and back to twelve o’clock;
  2. Look right to left from three o’clock to nine o’clock and back to three o’clock;
  3. Look diagonally from one o’clock to seven o’clock and back to one o’clock;
  4. Look from eleven o’clock to five o’clock and back to eleven o’clock.
  5. Now start at twelve o’clock and look at each number around the face of the clock.
  6. Then, start again at twelve o’clock and move in the opposite direction. Circle the cock clockwise three times, then reverse. Try to keep your head still and move only your eyes.

7th chakra is at your crown and it’s your connection to your thoughts and your understanding of the world around you and how you fit into it. 

Headstand (modified) – From all fours position, put top of head on mat. Put arms in an “L” shape position. Place one knee at a time on triceps. If able, straighten legs to ceiling.

Plough – Sit cross-legged. Take hold of your toes from the outer side of your knees. Breathe in and out. Roll backwards. Then, let go of your toes while bending your elbows. Use your hands to support and lift your back. Straighten your legs and lift them past your head until your bent toes touch the floor. Squeeze your shoulders and elbows together. Breathe in and out. To relax in this pose, bend your knees and rest them on the floor on either side of your head. Rest your hands at the back of your knees.

The sky is starting to get light and we are close to the sun peaking over the Eastern horizon. It’s time to return to our coffins to rest. Close your eyes and shut the lid. Imagine what the inside of a coffin must be like. There is no light; no sound; the interior is soft, the bedding you are resting on is comfortable; take a sniff of your lavender, the smell can be calming. Shutting out your senses can be calming on your nervous system. 

Corpse Pose – Lie on your back and relax.

Bring your awareness to the base of your spine, feel your tailbone and sacrum region on the mat. Feel the space between your lumbar region and the mat. Does it feel like you could drive a truck underneath your lower back or does it feel like only a bug could crawl under? <Pause> Feel your ribs expand into the mat as you inhale air into your lungs. <Pause> Press your shoulder blades into the mat and then relax. Let your cervical spine make a natural bridge between your collar bone and back of the skull. 

VISUAL VIGNETTES

Make Pop-up Cards. Fold 8.5×11” paper in half. Refold top half edge to folded edge. Draw half circle along second edge, make upper half of a scary face (no mouth). Draw a pair of short legs and feet on paper so that it looks like half face and legs are attached. Unfold paper and draw other half of circle to complete face and draw a smile. Draw rest of the body. Make sure your shoulders are the width of your legs. Draw arms at sides.

Write I AM…. in bold lettering above the head. Put a dot that represents each color of chakra alongside the body. Don’t put the dots above or below the two folded seams. Write words alongside corresponding color: Red: Safe, Orange: Creative, Yellow: Strong, Green: Loved, Blue: Expressive, Indigo: Connected, Violet: Divine.

CLOSING CIRCLE

We only have this one body to care for in our lifetime. Luckily, we have modern medicine to help us repair a broken bone, fix a tooth and make our eyesight better but the true way to stay healthy is by making healthy choices every day that keep you feeling at ease, peaceful and joyful.

Diamond Breath/Bridge of Diamonds – Begin in Heel-Sitting pose. Inhale as you lift your arms overhead. Form a diamond above your head with your pointer fingers and thumbs touching. Exhale as you lower your arms back down to your sides. Repeat. Then hold your diamond shape above your head. Close your eyes and envision a beautiful, sparkling diamond floating above your head. Feel it grow larger and more brilliant. Now open your thumbs and let the magical sparkly diamond dust flow into the top of your head, through the crown chakra and over your whole body. Feel the diamond light surrounding you. Now lift your torso off your heels. Join hands with the children next to you and feel the diamond light move through your group to create a bridge of diamonds. Imagine joining hands with children across the globe and forming a bridge of diamonds; a rainbow of beaming light that spans across the world. Together our love and light will shine in peace.

Share the following quote from Elizabeth Kubler-Ross:

People are like stain-glass windows. They sparkle and shine when the sun is out, but when the darkness sets in, their true beauty is revealed only if there is light from within.


Learn to write and teach your own Halloween lesson plans with YogaKids!

International Day of Peace Class Plan

International Day of Peace Logo

The International Day of Peace (“Peace Day”) is a global holiday celebrated annually on September 21. Established in 1981 by a United Nations resolution, Peace Day asks us to commit to peace above all differences and to contribute to building a Culture of Peace. Here’s a wonderful class plan for celebrating this holiday with your YogaKids!

AGE GROUPS

7-11, 12+

MATERIALS

What does Peace Feel Like by Vladimir Radunsky, paper and markers or crayons, music

SHORT DESCRIPTION/TOPIC

Children will explore what peace means to them and practice yoga poses to help them integrate the concepts presented.

DISCUSSION POINTS

Introduce the topic. The International Day of Peace (“Peace Day”) is observed around the world each year on September 21. Established in 1981 by a United Nations resolution, Peace Day asks us to commit to Peace above all differences and to contribute to building a Culture of Peace. What ideas to you have to help celebrate this day with your family and friends?

CONNECTING CIRCLE

Peace Breath – Close your eyes. Relax your face muscles. Breathe in. Breathe out and whisper the word “peace.” Do these 3 to 6 times. As you say the word, feel the peace inside you. Send peace to the animals, trees and plants. Send peace to your family and friends. Send peace to countries in the world that are at war. Send peace to all the people you love.

POSES AS PATHWAYS

What does peace feel like? Read the book and present the following:

Peace in many languages:

  • Pace – Italian
  • Paix – French
  • Paz – Spanish

What does peace smell like?

Flower Pose – Sit cross-legged, lean back and place your arms under your knees and balance.

Pizza – Sit with your legs wide apart. Roll out and stretch the pizza dough to the right by slowly sliding your hands down your legs from your right thigh to your right toes. Then repeat on the left side. Now spread some sauce on the slice by moving your hands from side to side on the floor in the space between your legs. Add your favorite toppings.

What does peace sound like? Play some beautiful music of your choice.

What does peace taste like?

Popcorn: Start in child’s pose. Stay still and feel the warmth coming up from the popcorn maker beneath you. Now if you are ready – jump high into the air and POP. POP. POP. Repeat and pop!

What does peace feel like?

Sun Salutation – Start standing in Mountain pose, raise arms overhead and stretch upward. Fold forward into Ragdoll. Step back with right leg into a lunge. Step back with left leg to Lizard (plank). Slowly come down to the floor with your knees, chest and chin. Bring your hips down to the floor, and lift up into S is for Snake (cobra). Curl your toes under and stretch into Down Dog. Step forward with right leg into a lunge. Step forward with left leg into Ragdoll (forward fold) . Stretch arms outward and return to standing. Raise arms overhead and stretch upward. Repeat cycle, leading with the opposite leg.

Grugging – gGoup or individual hugs

Imagine what you could with peace.

Ladder to the Clouds Stand tall. Reach up and begin to climb a very, very, very tall, imaginary ladder. Climb all the way to the clouds and beyond. Now slowly lower to the ground as you climb back down to a crouch and rest in Child’s Pose.

PARTNER POSES

Standing Partner Stretch – Stand back to back in Mountain pose. Both partners take one “baby step” forward. Reach back and take hold of each other’s hands or wrists. Keep your feet rooted to the floor. Lean gently away from each other until you both feel a nice stretch opening your chest s and shoulders.

Sit and Twist – Sit cross-legged in front of your partner with your four knees touching. Put your right arm behind your back, reach out with your left hand and grab your partner’s right hand. Breathe in and sit up tall. Breathe out, turn away from your partner, twist your spine, and look over your right shoulder. Switch sides and repeat.

GROUP POSE

Tree – Stand in a tight circle, each member lifts the right foot, bend the right knee, and press the foot against the inside of the left leg. Reach out and hold hands.

VISUAL VIGNETTES

Peace Drawing

Have the children draw their version of peace to celebrate the International Day of Peace.

QUIET QUESTS

Peace MeditationLie down and close your eyes. Notice your belly gently rise and fall. As you exhale, feel more and more relaxed. Imagine your exhale melting all your tension. (pause) Notice how you feel, imagine you are filled with peace. (pause) Now send peace to the animals. (pause) To the trees. (pause) Send peace to your family. (pause) Send peace to your friends. (pause) Notice how you feel. Now completely rest. (pause for 2-5 minutes) Now wiggle your fingers and toes. (pause) Stretch your arms overhead. (pause) Slowly roll onto one side. (pause) Gently come up to sitting.

CLOSING CIRCLE

Fountain of Oms– Everyone chants OM at their own pace and rhythm. We start together, but everyone’s duration is different. Just let the OMs keep coming at various intervals; some short, some long. Feel the Fountain of OMs wash through and around you. The sound and vibration is very powerful. Keep your eyes closed and keep chanting. Keep the OMs flowing and allow the sound to cease with its own natural conclusion.


Learn to write and teach your own YogaKids lesson plans!

Ozone Shield Craft

ozone craft

A Visual Vignette classroom idea for integrating important Earth science from YogaKids Apprentice Rebecca Lizotte:

Stand in Mountain Pose with the Earth (a print out, globe, or ball) in the center of the group. Imagine your climbing a gigantic ladder up to the cloud into the stratosphere. (Ladder to the Clouds pose). Share the following about the Earth…

The stratosphere is between 5 and 31 miles above the ground, where the earth is protected by a brave group of tiny defenders called ozone molecules. They band together and form a shield around the globe called the ozone layer. She then had the group hold hands and protect our earth like the ozone molecules. These molecules let in the suns life giving warmth but shield off the sun’s harmful ultraviolet rays.

Unfortunately on earth, years ago, humans made chemicals that attack the ozone layer, called CFCs. These chemicals were used in refrigerator, air conditioners and aerosol spray cans. Once we figured out that these chemicals were harmful to the ozone layer, most countries in the world stopped making them. But we still have to be aware of the bad ultraviolet rays. Ultraviolet rays are bad for your eyes and your skin. That’s why it’s important to stay out of the sun or wear sunscreen and sunglasses when we go outside.

Have your class make an Ozone Shield Pomander Ball using an orange, whole dried cloves and toothpicks. Students perforate the orange with the toothpicks and creatd the outline of a shield with a circle (sun) in the middle. Have the kids insert the cloves (ozone molecules) along the perforation. Pro Tip: To preserve, place the pomander in a paper bag to dry out for a few weeks. The cloves will draw out their moisture. Throw away if mold appears.


Change the world as a YogaKids Teacher! YogaKids!

Spring Time Yoga Poses

girl in butterfly pose

Spring is such a magical time… and here in the Magical Garden, we LOVE IT so much! The weather gets warmer and flowers begin to bloom. It’s a time for bunnies, butterflies, and flying kites. Join us in celebrating spring with some of our favorite YogaKids poses!


Reach for the Sun

  1. Begin in by standing tall in Mountain pose.
  2. Breathe in and reach up high with an outstretched hand.
  3. Grab a piece of sunshine and pull the power into your solar plexus, your inner sun.
  4. Exhale with a “HAH” breath.
  5. Repeat with the other arm.
  6. Alternately reach with the left and right arms.
  7. As you practice, increase the force of your breath.


 Circle of Friendship Flowers

  1. Kneel in a circle with a group of your friends. Hold hands.
  2. As you inhale, reach your arms up, lift your buttocks off your heels, and stretch back arching your back and neck.
  3. As you exhale, continue to hold hands and fold down into Child’s Pose.
  4. Repeat a few times imagining all the different flowers that you could be.


Butterfly with Antennae

  1. Begin in L-Sitting pose, with your legs straight out in front of you.
  2. Bring the bottoms of your feet together, with your heels close to your body and your knees out to each side.
  3. Stretch your neck and the top of your head toward the sky and make your spine longer.
  4. Place your hands at the sides of your head and stick up your pointer fingers to make antennae.
  5. Pull your arms back like they’re your wings.
  6. Breathe in and out as you flap your wings forward and back, up and down.


Kite  

  1. Begin by standing tall in Mountain pose.
  2. Come onto your tippy toes and stretch your arms up and out to the side like tree arms.
  3. Lean to one side and stretch a leg out to the other side.
  4. Change sides.
  5. Play with your balance as you find your way and move with the wind.
  6. Feel your body flying like a kite!


Bunny Breath

  1. Get comfortable in a seated pose.
  2. Make your neck and back as long as you can, tucking in your chin slightly and letting your lower jaw relax.
  3. Take short, quick breaths in through your nose.
  4. Twitch your nose like a bunny. Then breathe out through your mouth with a long, smooth sigh.
  5. Repeat, increasing the number of inhalations and the length of your exhalations as your breath power gets stronger!

Learn more Spring Time poses as a Certified YogaKids Teacher!

Spring Is in the Air (a free YogaKids class plan!)

butterflies and flowers

What better way to celebrate the spring season than with a fun-filled YogaKids spring-themed lesson plan? Perfect to use in the home, studio or classroom, this FREE class plan includes a spring craft, a We All Win yoga game, an original yoga flow, poses perfect for the season, and much more!

MATERIALS

  • name tags
  • crayons
  • sharpies
  • coloring pages
  • ping pong balls
  • straws


CONNECTING CIRCLE

Spring is March 20 to June 21. When it’s spring in the northern hemisphere, it’s fall in the southern hemisphere (Australia). Share fun facts about spring as you do the following poses together:

  • Reach for the SunWe are closer to the sun in the spring.

Begin in Open Mountain pose. Breathe in and reach up high with an outstretched hand. Grab a piece of sunshine and pull the power into your solar plexus, your inner sun. Exhale with a “HAH” breath. Repeat with the other arm. Alternately reach with the left and right arms. As you practice, increase the force of your breath.

  • Moo and Meow  – Many animals have babies in the spring.

Begin in All Fours Pose. Line up your wrists under your shoulders. Spread your fingers wide and arch your spine to the sky. Loosen your neck and drop your head down. Breathe out long as you meow. Now lift your chest forward and look up with big cow eyes. Dip your belly down and tilt your sitting bones up. Your back will sink down like a cow’s. Make cow lips and moo deeply from the back of your throat. Go back and forth, meowing and mooing.

  • Polar BearAnimals such as bears who hibernate start to wake up and become active.

Begin in Heel-Sitting pose. Open your knees wide apart, toes touching behind you. Bend forward at the hips and slide your chest along the floor. Place your chin on the floor and put your paws over your nose to keep yourself warm. Breathe in and out.

  • Finger-Dancing/Salutations to MeDuring April, you will see more rain showers.

Sit on your heels or cross-legged. Begin at the top of your head and gently stimulate your hair and skin by lightly dancing your fingers all the way down your body. Allow the self-touch to feel good, as it wakes you up, stimulates your skin and lymph system and makes you feel alive. Do this technique along with Salutations to Me. Each time you touch a part of your body say a silent affirmation or kind statement to that place: toes; skull, hair, face, ears, neck, throat, chest, breasts, belly, bottom, legs, arms, feet, etc.

  • Circle of Friendship FlowersMay the flowers will start to bloom.

Kneel in a circle, holding hands. As you inhale, reach your arms up, lift your buttocks off your heels, and stretch back arching your back and neck. As you exhale, continue to hold hands and fold down into Child’s Pose. Repeat a few times imagining all the different flowers that you could be.


POSES AS PATHWAYS

Do a Planting Seeds Yoga Flow together!

  • Mountain Stretch your arms up overhead and say “hello” to the sun and pluck some “seeds.”
  • Ragdoll Dig a little hole and plant the seeds.
  • Standing Half Forward BendLift halfway and pretend to pour water on the planted seeds.
  • Ragdoll Pat down the dirt around the planted seeds a bit more.
  • MountainClasp hands overhead, making a “sun” with raised arms.
  • Repeat the previous poses one time.
  • Low SquatIt’s time to see if anything has sprouted! Squat down low. I see something!
  • Mountain
  • TreePlace one leg on the shin and grow your branches up. What kind of tree are you?
  • Repeat the transition from “squat” to “tree” on the other side.

Celebrate springtime activities with the following poses:

  • Kite

Begin in Mountain pose. Come onto your tippy toes and stretch your arms up and out to the side like tree arms. Lean to one side and stretch a leg out to the other side. Change sides. Play with your balance as you find your way and move with the wind. Feel your body flying like a kite.

  • Wind Chimes

Stand with your feet a little wider than hip-distance apart. Swing your arms back and forth in harmony with your breath. Be sure to keep your feet planted. You are a wind chime moving with the wind. Now separate your feet into a wide stance. Bend forward and take your right hand to your left leg. Lift your left arm to the sky and look up. Now lower your left arm and take it to the right leg. Twist your torso towards the sky and look up. Go back and forth several times.

  • Roller Coaster – Amusement parks are open in the spring, and many towns host festivals!

Sit down in a line with your legs spread wide. Clasp your hands around the person in front of you. As the roller coaster climbs up the hill, lean back. Then lean forward as you speed downhill. Be brave and raise your hands as you lean from side to side

  • Butterfly with Antenae

Begin in L-Sitting pose. Bring the bottoms of your feet together, with your heels close to your body and your knees out to each side. Stretch your neck and the top of your head toward the sky and make your spine longer. Place your hands at the sides of your head and stick up your pointer fingers to make antennae. Pull your arms back like they’re your wings. Breathe in and out as you flap your wings forward and back, up and down.

  • Bridge – Some people take trips in the spring to visit family!

Lie on your back with your arms by your sides. Place your feet hip-width apart as close to the sit bones as possible. Press your feet into the ground and lift your hips to the sky. Place your hands however it’s comfortable to support your lower back and pelvis. Lift your chest and arch your spine.


WE ALL WIN

Play Ping Pong Ball Breathing. Give each child a straw. Blow a ping-pong ball around the circle by blowing.


VISUAL VIGNETTES

Print or draw flowers with 4-8 petals and have the students color in the flowers with a light color crayon, then write something they love about themselves on each petal.


QUIET QUESTS

The Cherry Blossoms – “My friend Rengetsu was returning from a pilgrimage when she stopped in a town to rest for the night. Although she appeared tired and hungry, each door she knocked on refused her lodging. As the sun began to set behind the hills, she hiked up to a cherry orchard on the hillside. There she made a little bed of leaves under the trees and fell asleep. But something stirred her in the middle of the night. A beautiful scent fell over her. Pulling herself up from the sleep, she saw the loveliest of sights, the black sky behind dozens of trees with pink cherry blossoms, all blooming radiant and shimmering in the moonlight. Rengetsu took in the beautiful experience. Then she turned toward the town, gave a little bow, and said, ‘Oh people of the village, thank you so much for turning me away tonight, for if you did receive me, and give me a place to rest in your home, then I would never have been able to witness such beauty!’” Imagine you are lying in the cherry blossom.


CLOSING CIRCLE

  • Fountain of Oms

Everyone chants OM at their own pace and rhythm. Start together, but everyone’s duration can be different. Let the OMs keep coming at various intervals; some short, some long. Feel the Fountain of OMs wash through and around you. The sound and vibration is very powerful. Keep your eyes closed and keep chanting. Keep the OMs flowing and allow the sound to cease with its own natural conclusion.

  • Namaste

Put your hands together at your heart and bow to each other.


Learn to write and teach your own YogaKids lesson plans!

Presidents’ Day Cookies

president's day cookies

President’s Day is a national holiday celebrated on the third Monday of every February. What better way to honor some of our founding fathers on President’s Day than with a sweet treat in the likenesses of George Washington and Honest Abe? Here’s the super-simple recipe for these creative cookies!

You will need:

  • Sugar cookies (fully cooled)
  • Chocolate bar that’s divided into sections (if you need to cut the chocolate, dip the blade of a sharp knife in hot water for a few seconds so the chocolate doesn’t break)
  • Black gel icing
  • Regular chocolate or vanilla icing (homemade royal icing would work the best, but we just grabbed a tub of cake frosting off the shelf for this project)
  • For small president cookies, use mini-marshmallows (dehydrated, for hot cocoa — you can sometimes find these in shaker canisters in the baking aisle), mini-chocolate chips
  • For large president cookies, use mini-marshmallows, full-sized chocolate chips

Use the icing to attach the hats, chocolate chips, and marshmallows to the cookies, then draw on little faces with the black icing. You may need to let the icing set for about half an hour so Abe’s candy bar hat will stay on as you serve the cookies.

About Presidents’ Day

This year, Presidents Day falls on Monday, February 20, 2017. February 22 was George Washington’s birthday, and Presidents Day began as a day to honor our very first president. For what presidential actions were Abraham Lincoln and George Washington most well-known? Who is your favorite president, and why? Can you name the Presidents in order? Here is a list of the US Presidents, from the founding of this nation to the current day.

  1. George Washington, 1789-1797
  2. John Adams, 1797-1801
  3. Thomas Jefferson, 1801-1809
  4. James Madison, 1809-1817
  5. James Monroe, 1817-1825
  6. John Quincy Adams, 1825-1829
  7. Andrew Jackson, 1829-1837
  8. Martin Van Buren, 1837-1841
  9. William Henry Harrison, 1841
  10. John Tyler, 1841-1845
  11. James Knox Polk, 1845-1849
  12. Zachary Taylor, 1849-1850
  13. Millard Fillmore, 1850-1853
  14. Franklin Pierce, 1853-1857
  15. James Buchanan, 1857-1861
  16. Abraham Lincoln, 1861-1865
  17. Andrew Johnson, 1865-1869
  18. Ulysses S. Grant, 1869-1877
  19. Rutherford Birchard Hayes, 1877-1881
  20. James Abram Garfield, 1881
  21. Chester Alan Arthur, 1881-1885
  22. Grover Cleveland, 1885-1889
  23. Benjamin Harrison, 1889-1893
  24. Grover Cleveland, 1893-1897
  25. William McKinley, 1897-1901
  26. Theodore Roosevelt, 1901-1909
  27. William Howard Taft, 1909-1913
  28. Woodrow Wilson, 1913-1921
  29. Warren Gamaliel Harding, 1921-1923
  30. Calvin Coolidge, 1923-1929
  31. Herbert Clark Hoover, 1929-1933
  32. Franklin Delano Roosevelt, 1933-1945
  33. Harry S. Truman, 1945-1953
  34. Dwight David Eisenhower, 1953-1961
  35. John Fitzgerald Kennedy, 1961-1963
  36. Lyndon Baines Johnson, 1963-1969
  37. Richard Milhous Nixon, 1969-1974
  38. Gerald Rudolph Ford, 1974-1977
  39. James Earl Carter, Jr., 1977-1981
  40. Ronald Wilson Reagan, 1981-1989
  41. George Herbert Walker Bush, 1989-1993
  42. William Jefferson Clinton, 1993-2001
  43. George Walker Bush, 2001-2009
  44. Barack Hussein Obama, 2009-2016
  45. Donald John Trump, 2016 (current)

Happy Presidents’ Day!


Create and teach your own Great Ideas as a Certified YogaKids Teacher!

“Sugar-free” Crustless Apple Pie

basket of apples

No sugar, no crust…is this even pie?

I guess it’s not technically pie, but it has all the right flavors and it’s delicious!

Apples have lots and lots of natural sugars, like most fruits. Along with bananas, apples have some of the highest natural sugar content of any fruit. Sometimes apples and apple juice are even used as sweeteners, instead of processed sugar, for organic and natural desserts.

What does processed mean when we’re talking about sugar? The white granular sugar you may see in your home is usually made from these two plants:

Sugar cane is a type of grass that is packed full of natural sugar. Sugar beets are beet plants with very sugary roots. When they are processed, the cloudy brown, sugary juices are squeezed out of the plants by machines. The water from the juice evaporates, and brownish sugar crystals are left over. Sometimes these brown sugar crystals are sold as sweeteners. Sometimes, they are cleaned even more, pulling out all the minerals and vitamins and leftover microscopic bits of plant matter, until it is sparkling and white, leaving only the sugar behind. This is what we call table sugar. It is as pure as sugar gets.

It’s OK to have this type of sugar in moderation, meaning sometimes, and in small quantities. But it’s better for your body if you can enjoy sweets in their natural form, like eating a whole apple or banana.

We’re going to make a delicious apple-pie-like dessert, with only the sweetness of the apples themselves for sugar!

Ingredients:

  • Four large sweet apples, cored, skinned (optional), and sliced thinly. (Try Pink Lady, Gala, Fuji, Jonagold type apples)
  • 1 teaspoon cinnamon
  • 1 teaspoon nutmeg
  • 1/2 teaspoon salt
  • 1 Tablespoon flour or gluten-free flour
  • 1/4 cup water
  • 3 Tablespoons of slightly melted butter or margarine (don’t get it too hot, or it will burn you!) *

Instructions:

Preheat your oven to 350 degrees.

Put all the dry ingredients into a mixing bowl and combine well. Melt the butter in the microwave for 10-15 seconds. Add the apples and toss them into the mixture to lightly cover them with the spices and flour. Now add the water and melted butter, and smoosh it all around with your fingers until all the apples are covered with the spices and flour mixture. Spread everything out evenly in an 8×8″ baking pan and bake for about 40 minutes, stirring the apples every 10-15 minutes.

What you will end up with is an ooey-gooey apple pie filling that you can eat just like it is for a healthy snack or dessert, put on top of ice cream, or add to a bowl of granola. Yum!

* Vegan Option: Replace butter with coconut oil.


Create and teach your own Great Ideas as a Certified YogaKids Teacher!


Animal Hand-tlers

Animal Hand-tlers Craft

An easy craft for the season! Create Animal Hand-tlers to wear while you celebrate the holidays!

Supplies:

  • Two pieces of card stock or construction paper per pair
  • Scissors
  • Writing utensil
  • Stapler and/or glue
  • Optional: coloring tools, paints, sequins, and other “flair” for decorating

Instructions:

  • Fold construction paper in half (short way) and trace hand on one half. Cut out both at the same time.
  • Fold other piece of construction paper in half, longways, and then each half in half. Cut along the lines. This will make one (with a left over paper strip) big head band or two small headbands.
  • Staple or glue the ends of the strips together to make them longer and measure the band around your head. If it’s not long enough, add a third strip to extend and cut to fit. Do not staple or glue them together to make the band yet.
  • The antlers will be laid out with the thumbs facing inward. Decorate or color them if you want to. Decorate or color the band if you want to.
  • Find the center of the band, and staple or glue the hand shapes to the inside, so the bottom of the palm is under the band.
  • Finally, close the band where it fits your head by stapling it together in the back, and then cutting off any parts that are too long.
  • Wear and make animal noises! What does a reindeer sound like? How about a moose?

Create and teach your own Great Ideas as a Certified YogaKids Teacher!