Pita Holiday Trees

Pita Trees

The holidays are filled with sugary-sweet snacks… from Christmas cookies to candy canes to delicious homemade pies. That’s one reason we LOVE this healthy kid-friendly snack… that’s simple enough for kids to put together without help!

Total time: 30m or less

Ingredients:

  • Package of pita bread
  • Green Garden Dip* or other green and white dip – like tzatziki, spinach dip
  • Brightly colored veggies (tiny cherry tomatoes, red, yellow, and green peppers, black olive slices, etc.)
  • Optional: fresh dill

Instructions:

  • Cut each pita round like a pie, into eight triangles, and place on a serving platter, points up.
  • Spoon green dip onto each pita
  • Put little bits of fresh dill on top to look like pine branches
  • Chop the vegetables and decorate the “trees.”
  • Serve and eat! YUM!

GREEN GARDEN DIP RECIPE

Ingredients:

  • Large or mid-size container of Greek yogurt (not single serve)
  • Bundles of fresh leafy green herbs, like: dill, parsley, mint, basil, and tarragon.
  • 2-4 green onions. Use the whole thing, just cut off roots and any brown leaves
  • One clove fresh garlic, or a ½ Tablespoon of powdered garlic
  • ½ Tablespoon sea salt
  • ½ Tablespoon ground black pepper
  • Juice of ½ lemon
  • *optional – 2-3 Persian cucumbers, 1/2lb of spinach, water chestnuts, etc.

Instructions:

I use the two-pound size of Greek yogurt, because this green dip is SO delicious, you’ll want lots left over for veggie dip, sandwiches, dressing…you’ll be evaluating everything in the fridge as a possible vehicle for this yummy green goodness. If you want to make a smaller batch, just scale down until you get the herb-to-yogurt density you like. Drain the extra fluid/whey from the container of yogurt before you start. If you want to make a vegan version of this dressing, you can use coconut yogurt, but you might want to add some chickpeas, soft tofu, white beans, or pureed cashews to thicken the mixture.

Clean and leaf the herbs. Discard the stems or save them for flavoring stock. Chop the cucumbers into slices. Throw all the ingredients in a food processor and blend until herbs are ground small and dip is uniform. The more herbs you add, the thicker the dip will be. If you want to add a little more mass to the dip, throw in a Persian cucumber or two, or perhaps some spinach. If you use water chestnuts, drain well and dice small, and add them after the rest of the mixture is pureed.

The dip may be a little runny when you make it, but will thicken a little once it’s been refrigerated overnight. It’s fine to use right away for the pita trees, though.


Create and teach your own Great Ideas as a Certified YogaKids Teacher!

Holiday Stress Busters for Parents

Woman with Head in Hands

The holidays are upon us and as rich, wonderful and filled with love as the holidays might be we sometimes find ourselves surrounded by stress. But why choose that when you can choose something much more fun instead?

Use The Energy of Asking to make your YogaKids holidays the most stress free ever.

“Ask and you shall receive.” The great thing about the energy of asking is that you’re not looking for an answer. In fact, the point is simply to ask a question and then let it go. Easy! Not getting attached to the results of our actions is a core idea of yoga. Sit back and let the universe provide and dazzle you.

Here are 3 tools any parent can use in just seconds to stay cool as a breeze through the holidays

Question #1: Have you noticed how many people around you appear stressed out? Friends, family and even people on the street you don’t even know, right? What if the stress you’re experiencing is just picking up on everybody else’s stuff? What if that stress isn’t even yours?

So if you start feeling a little stressed, try asking the question, “Who does this belong to? Wait, is it really even mine?” Maybe just asking the question will help you feel a little lighter, a little more peaceful and relaxed. If asking the question brings even a twinge of a smile to your face, then you can say, “Return to sender.”  Whatever ‘it’ is —  just return it to sender, back to wherever it might have come from. You don’t have to know or try to figure it out! That part is not your job! Just pack it up and let it go.

Question #2: Having a holiday multitasking overload? Is rushing around making you crazy (see tool #1)? What if you can get everything you’d love to get done in a fun, centered, grounded way?

Your kids have learned to Take Five, how about you?

Take a moment, ground your feet to connect with the earth and and bring your awareness out of your head and into your heart. You can close your eyes if you like. Put one hand on your belly and use the other to take in a slow, five count inhalation. Exhale just as long or longer. Try doing this five times, although even once will work wonders.

You can do this anywhere and anytime. Sitting, standing or even laying down. If you’re in the middle of a store or at an auction you might want to keep your hand down!

Question #3: If you are shuddering at the thought of an upcoming holiday, gathering this simple question might just make all the difference in the world.

Simply ask, “How can this turn out far greater and more amazing than anything I could possibly imagine?” Remember you’re not looking for an answer, or a way to figure it out. Just ask the question and let it go. If your brain had the answer, you would have figured it out already! Ask the universe to show you something amazing and have fun seeing what happens!

Being in The Asking Energy allows the universe to do her stuff and show up for you in unpredictable and unexpected ways. Ask and let go of your expectations. One of the great lessons shared in YogaKids is that more joy and laughter serves us in the most magical of ways. Would you like to have some more of that? Just ask and and see what shows up!


Snowman Glitter Shaker

Snowman Glitter Shaker craft

GLITTER! What a great addition to a snow shaker! Your YogaKids will love this winter craft idea of a Snowman Glitter Shaker.

Supplies

  • One jar with a screw on lid (like a pasta sauce jar)
  • One 12”x12” piece of felt for the hat
  • Hot glue
  • Glycerin
  • A ribbon or other piece of fabric for the scarf
  • A pipe cleaner for the hat
  • A small piece of orange paper, cut into a triangle, for the carrot nose
  • A black sharpie for eyes and buttons
  • Other decorations, like jingle bells and pom-poms for the hat, or buttons for the eyes, mouth
  • Water
  • Plastic glitter in large and small sizes.

Instructions:

You may adjust the glycerin-to-water ratio for the size of your jar – I am using a 24 oz. jar in the example.

  • Remove the label and scrape off any leftover glue. Make sure the jar is completely dry.
  • Begin by tying the scarf onto the jar and adding a dot of hot glue to the front and back, between the ribbon or fabric and jar, to hold the scarf in place.
  • Glue on button eyes or draw on black circles for eyes, mouth, and buttons. Glue on the nose.
  • Trace a circle onto the felt using a bowl, and cut it out. Note: Using the lid of your jar as a guide, you should have no less than 1” extra fabric all around. I have about 1.5” margins on mine.
  • The larger the circle, the floppier the hat.
  • Add ¼ cup of glycerin and about 1 cup water. Put the lid on the jar and shake until mixture is homogeneous.
  • Put a maximum of 2 Tablespoons of plastic glitter into the jar, then fill until about 1” from the top of the jar. Put the lid on and make sure you like the consistency of the water and glitter. If you want to add more glycerin to make the glitter move more slowly, add it now and mix well.
  • Once you’re happy with the water viscosity, fill the last remaining space up to the brim and put the lid on. Dry any water spots that may have leaked out, and hot glue around the base of the lid.
  • Center the circle of felt on the lid and hot glue it in place.
  • Crimp the felt as needed to get the shape of hat you want, and wrap the pipe cleaner tightly under the base of the lid, twisting the ends to hold it together. You will probably need more than one set of hands for this step! Add decorations, like pom-poms, silk flowers, or a bow) over the place where you twist the pipe cleaner closed.
  • Let it snow!

Create and teach your own Great Ideas as a Certified YogaKids Teacher!

Handprint Menorah

Handprint Menorah craft

The Festival of Lights has begun! Celebrate with this easy Handprint Menorah craft… perfect for your YogaKids class or an at-home arts & crafts activity!

Supplies:

  • Patterned or brightly colored paper to use for candle flames
  • A piece of card stock
  • Tempera or other water based paint in the color you want your menorah
  • Scissors
  • Glue or glue stick
  • Metallic sharpies, paints, sequins, etc. optional – for decorating the menorah

Instructions:

  • Fold the card stock in half, and then unfold it. Lay it flat.
  • Placing your left hand on the left side of the paper, with your thumb straight up, across the center fold line.
  • Trace your hand, then repeat on the right side, with your thumb in the same place as the left thumb.
  • Paint inside the lines you just traced.
  • Allow paint to dry and then decorate over the top of the menorah.
  • Fold the piece of paper you’re using for flames in half. Draw five flame shapes and cut them out of the folded paper to make ten flames. (That’s one left over)
  • Glue a flame in the center, then “light” one finger of the menorah for each night of Chanukah.
  • Keep the extra flames in an envelope nearby so they don’t get lost, and enjoy the Festival of Lights!

Learn all our Great Ideas as a Certified YogaKids Teacher!

Body Concert

Holiday Bells

We all learn in different ways and some of us learn best through music and rhythm. By incorporating music with yoga poses, we not only tap into the passions of children, but poses come alive, are more fun and memorable. During the holiday season, we hear many familiar songs. This year, don’t just sing the songs, act them out or add movement – to make it a total body experience.

Many yoga poses mimic animals and many animals make noises. While doing Bug Pickin’ Chimp pose, kids can walk around like chimps and maybe even sing a holiday song with “ooo” and “eee” instead of words. Try singing “Jingle Bells” that way… it is fun and will surely make you smile! While on your belly, reach back and grab a hold of your ankles for Rocking Horse pose. Sing “Rudolph the Red-Nose Reindeer” and pretend to fly through the sky. Lift into Down Diggety Doggie Down pose. While walking around the room on all fours to the beat of the music, sing a rhythmic song like “Frosty the Snowman.” Don’t forget to walk backwards too!

Why not play a little game? Stand up for Tarzan’s Thymus Tap. While tapping just below the collarbone with your fingertips, tap out the beat to a holiday song everyone might know. See if someone can guess what song it is. Maybe try “We wish you a Merry Christmas” or “My Dreydl.” Maybe do Ankle-Heel-Toe Walking around the room for another game. While signing the “Twelve Days of Christmas” determine a certain way each “gift” walks. Maybe the first one is walking on the heels. Then each time you get to “a partridge in a pear tree” everyone walks on their heels. This can be a really fun way to sing the song and challenge your memory. Get creative and have fun with it!

Your kids will be so excited those holiday songs are now a full body experience – they just might add the poses the next time the family breaks out in song! (Learn all these poses in the book, YogaKids: Educating the Whole Child Through Yoga, available in the YogaKids Shop!)

YogaKids Poses:

  •   Bug Pickin’ Chimp
  •   Rocking Horse
  •   Down Diggety Doggie Down
  •   Tarzan’s Thymus Tap
  •   Ankle-Heel- Toe Walking

Create and teach your own Great Ideas as a Certified YogaKids Teacher!

Snowman Skewers

snowman skewer snack

Make fruit fun with these healthy Snowman Skewers! Easy enough for your YogaKids to make on their own, this super-cute snack is a perfect holiday treat!

Total time: 30m or less

Ingredients:

  • Bananas – each banana makes about two and a half skewers
  • One red and one green apple
  • A few red and green grapes
  • Chocolate chips or raisins (baby-sized chips work best)
  • Wood skewers
  • A flat serving platter or tray
  • Optional: a little bit of powdered sugar to dust serving plate with “snow” – works best when the platter is dark.

Instructions:

  • Cut ¾ – 1” thick slices of banana, put three on each skewer, circular cut side facing outward.
  • Quarter the apples and cut each quarter into thirds. Put on the skewer on top of the bananas – this is the snowman’s hat. Note: You might want to help little kids. It can be tough to get through the skin of the apple with the wood skewer, and we don’t want anyone getting stabbed!
  • Put a grape on the very top, over the apple, to make the hat’s pom-pom.
  • Using the chocolate chips, stick eyes and buttons into the bananas.
  • Optional: lightly dust your serving platter with powdered sugar and lay out all the snowmen.
  • Serve and eat; mmm… delicious!

Create and teach your own Great Ideas as a Certified YogaKids Teacher!

Winter Solstice YogaKids Lesson Plan

Snow Covered Forest

The Winter Solstice is a time of renewal. Bring in new light, joy and peace. Enjoy this FREE YogaKids Lesson Plan that will help your kids celebrate this special time of year!

MATERIALS

Suggested Music: Reach for the Sun (YogaKids Musical MusingsCelebration (Kool & The Gang), So I Jump in the Soup (Laurie Berkner), Namasté (YogaKids Musical Musings)

CONNECTING CIRCLE

Sit in a circle and share the following information:

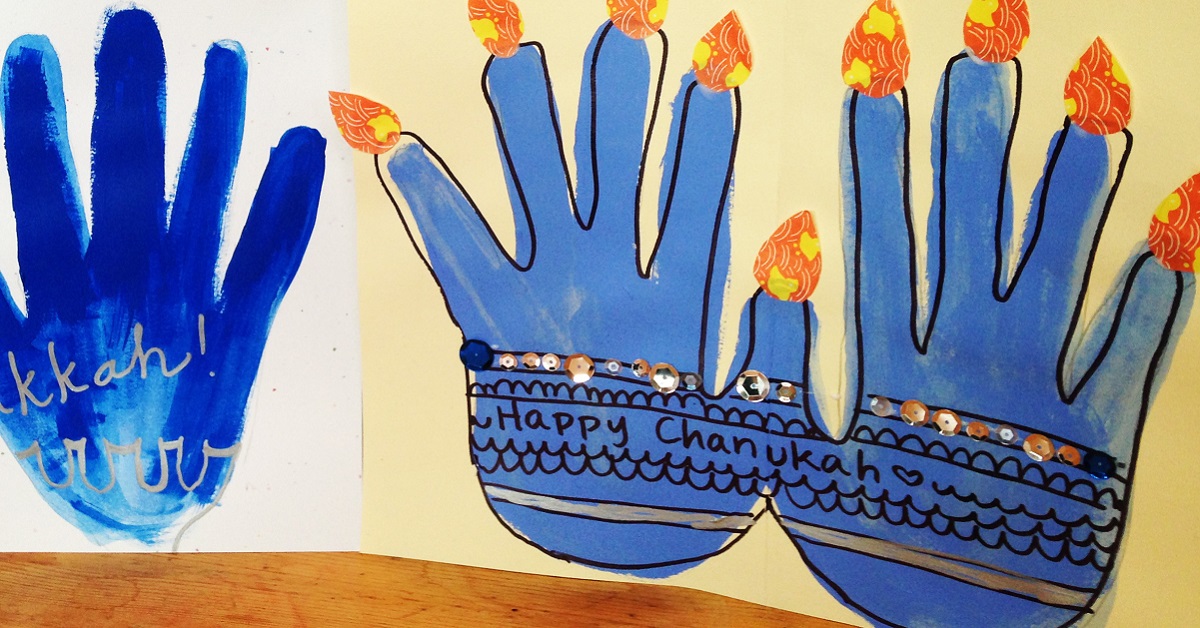
The winter solstice is the longest night of the year and falls on December 21 or 22 in the Northern Hemisphere and June 20 or 21 in the Southern Hemisphere. People all over the world recognize this day as the “return” of the sun in a variety of ways. Some traditions actually influenced current holidays such as Christmas and Hanukkah.

Go around the circle, share something you love to do in the winter time and act it out in your very own yoga pose or movement.

POSES AS PATHWAYS

Take 5 – Let’s begin by connecting with our breath.

Sit cross-legged. Lift one finger at a time as you breathe in through your nose and count in your mind: 1,2,3,4,5. Pause with your hand up and then slowly breathe out through your nose as you count backward: 5,4,3,2,1, putting down one finger at a time for each number. Do “Take 5” twice more.

Reach for the Sun – Let’s celebrate the return of the sun after the longest night of the year.

Begin in Open Mountain pose. Breathe in and reach up high with an outstretched hand. Grab a piece of sunshine and pull the power into your solar plexus, your belly, your inner sun. Exhale with an audible “HAH” breath. Repeat with the other arm. Alternately reach with the left and right arms, pulling your hands into your center. As you practice, increase the force of your breath. Repeat a few more times (or play the YogaKids song “Reach for the sun” while you act it out).

Freeze and Flow – We can celebrate the winter solstice with a game.

Put on some fun music (ie Celebration), dance around the room and celebrate the Winter Solstice. When the music stops, freeze in a pose pretending to do something you love to do in the winter time. (Remember your ideas from our connecting circle). When the music starts again, continue to celebrate and dance.

*Soyal is a winter solstice celebration of the Hopi Indians of northern Arizona. Ceremonies and rituals include dancing and gift giving. At the time of the solstice, The Hopi welcome protective spirits from the mountains.  

Volcano  Let’s do Volcano pose and allow those spirits to release from the mountains.

Begin in Mountain pose. Bring your fingertips together at the chest. Jump your feet apart. Place your palms together at the center of your body in Namaste Position. Watch your hands as you raise them over your head. Breathe out as you explode your arms outward. Lower them to your sides and return your hands to Namaste. Erupt and release again and again.

Bold Warrior 1/ Brave Warrior 2 – Let’s be like the brave Hopi Indian Warriors.

Begin in Mountain pose. Step back with one leg while bending your front leg. Keep your hips facing frontward as you raise your arms straight above your head. Say “I am bold”. From Bold Warrior, turn your back foot slightly outward and brings your arms down parallel to the floor. Keep your front knee bent over your ankle. Say “I am brave.” Return to Mountain pose and repeat on the other leg.

*Yalda is a festival in Iran that started in ancient times. It is a celebration of the victory of light over dark and the birth of the sun goddess Mithra. Yalda is a Syric word that means “birth”. Families would stay awake all night long to welcome the morning sun and celebrate with special food like nuts, watermelon and pomegranates. It is believed that by eating summer fruits at the begin of winter, one would not fall ill during the cold season.

Seed to Tree – Time to plant our favorite summer fruit and grow it for the Yalda festival. Fruit grows on trees, so let’s plant a seed and become our favorite fruit tree. Which fruit would you like to grow?

Come down to your knees, pretend to dig a small hole in the earth. Plant a small seed and cover it up. Pretend you are the seed. From Child’s pose, begin to sprout leaves, allow your hands to grow away from the body and grow, lifting onto your knees and extending the arms up high. Grow taller and taller into Tree pose, standing on one leg with the opposite foot planted on your calf or thigh. Raise your arms above your head and stretch them out. Repeat on the other leg – and grow a new fruit tree.

Table of Contents – Now that we grew our favorite fruits, it is time to eat them at our winter celebration. We will make a table with our bodies for the yummy feast.

Lie on your back. Bend your knees and place your feet on the floor. Press down with your hands and feet, lifting your body up until you are in table position. Be sure to keep your hands underneath your shoulders, fingers pointing towards your body.

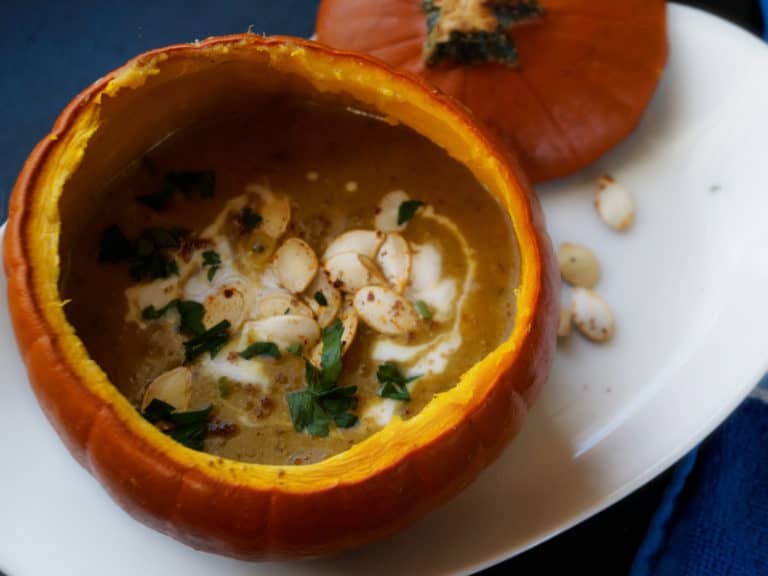
*Dong Zhi, means “winter arrival” and  is an important festival in China. It is a time for family to get together and celebrate the year they had. It is thought to have started as an end of the harvest festival, with workers returning from the fields and enjoying the fruits of their labors with family and traditionally eat a sweet soup made of rice balls.

Plough – Farmers use ploughs to break up the soil and prepare it for planting. We can pretend to be ploughs too.

Sit cross-legged. Take a hold of your toes from the outer side of your knees. Breathe in and out. Roll backwards, let go of your toes while bending your elbows. Use your hands to support and lift your back. Straighten your legs and lift them past your head until your bent toes touch the floor. Squeeze your shoulders and elbows together. Breathe in and out.
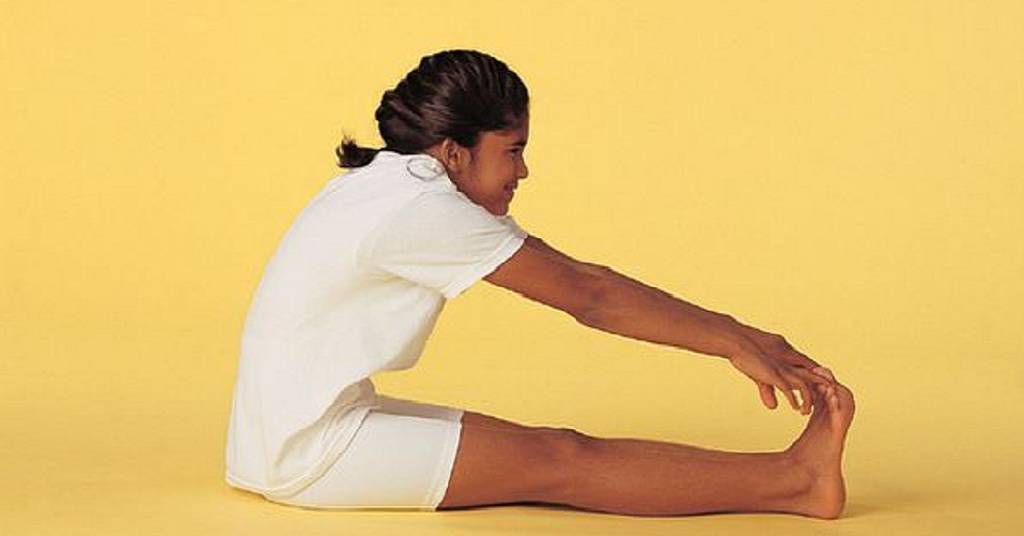
Soup Bowl (Row Your Boat)We can make our bodies into the shape of a soup bowl.

Begin in L-sitting pose and place both hands next to your hips. Lengthen your arms and spine. Lean back and lift your legs off the floor. Balance. Stretch your arms forward, bend your elbows and round your arms like the sides of a soup bowl.  (play the song “I jump in the soup” by Laurie Berkner, follow the lyrics and add arm movements to represent swimming, galloping and splashing in the soup).”’

Sunrise/Sunset – The day is done and our celebrations around the world have come to a close. It is time for the sun to set on our Winter Solstice.

Come down to your knees and sit your hips back to your heels for a Child’s Pose. Let’s walk our hands to the right, since the sun rises in the East. Inhale your arms up the sky as you come up onto your knees, reaching North. Exhale as the sun sets to the West, releasing your hands down to the left and returning your hips to your heels. Each time we lift up is like the Sunrise, and come down like the Sunset. Repeat a few more times as we prepare our bodies for rest.   

QUIET QUESTS

While facing each other or sitting in a circle or small group, place a candle in the middle of the circle representing new light. Eyes may be closed, or open and focused on the candle flame. Breathe slowly. Hands may be placed on your belly or in your lap. Take a few moments to just be with yourself, your breath and your thoughts.

Envision your family and friends – forgive anyone you are not getting along with, and allow any negative thoughts to stay in the darkness. Time to focus on the light and the light in others.

Give thanks to these people – give them a gift of quality (peace, joy, love). Take a moment to think of each person and and send them their special gift.

CLOSING CIRCLE

Namasté – Bringing the hands to heart center, say Namasté to each other, acknowledging the light within each of us.  Namasté 


Learn to write and teach your own YogaKids lesson plans!

Snow Salutation

Children playing in the snow

A sun salutation in yoga is a sequence of poses, linked together with your breath. They are a wonderful way to wake up in the morning, and celebrate the sun and how it helps give life to all living things. This winter, you can do a new version of this — a SNOW SALUTATION — and offer up some gratitude to this magical, festive season.

  1. Reach your arms up high and grab some snowflakes.
  2. Bend forward at your waist and pat the snow on the ground.
  3. Lift half way up to look up at the snow falling.
  4. Jump your feet backwards like a snowshoe rabbit. Keep your elbows hugging next to your ribs, and slowly lower your body down to the soft fluffy snow.
  5. Press your mittens into the snow and look up (Snake). Catch some snowflakes with your tongue.
  6. Roll over on to your back and make a snow angel.
  7. Roll back to your belly and take a little rest in Child’s Pose. You are a little mouse in the snow.
  8. Lift your bum up and press down. Now you’re a wolf in the snow (Down Diggety Doggie Down). Howl! 
  9. Bend your knees, look at your hands and jump forward like a snowshoe rabbit.
  10. Pat the snow on the ground.
  11. Stand up, and reach up for some more snowflakes with your mittens.
  12. Look up! Stick out your tongue and catch some!
  13. Bring your hands to your heart center in Namaste pose.
  14. Repeat!

Learn all our Great Ideas as a Certified YogaKids Teacher!

‘Tis the Season of Patience

YogaKid in Peanut Butter and Jelly Pose

Sitting in a circle, legs stretched straight out in L-Sitting Pose, we raise our arms to sit up even taller. We then reach for our toes in Peanut Butter and Jelly Pose. Some of the kids groan or sigh as they discover the furthest they can touch is not much past their knees. Then they see others in the class who can reach further than them. This comparison may lead to frustration with the pose, which can translate to irritation with oneself. Overstretching can occur, some of the kids wanting to reach their toes NOW.

We may not get to touch our toes today. We may not even achieve it in a few sessions. It might take much longer than that. It hinges upon what we are told is a virtue: patience.

In exploring this forward fold asana I see a valuable lesson about patience unfolding. Patience can be defined as the ability to wait calmly, the capacity to accept delay without getting angry. This subject is so timely with the holidays quickly approaching. I’m thinking about this while going about my daily routine — one that includes being stuck in traffic and waiting in lines at the grocery store. As the holidays loom closer, the lines will get longer and tempers will get shorter. There will be more rushing about and even more frazzled nerves. And it makes me wonder, where is patience? And if I don’t have patience, how can it be cultivated?

The seeds of patience must be sown and nurtured within ourselves before we can express it towards others. I have to be patient with myself first. If I cannot be patient with myself, then how can I expect to be patient with others? I work on studying patience within my own practice, noticing that how far I can reach may vary from day to day. I may have to make adjustments and modifications. And hopefully this acknowledgment of where I am is how I view where others are within and beyond the yoga studio.

Revisiting PB&J Pose, we work on determining and then accepting where we currently are in the pose. I assure one student that she is where she needs to be right now if she can only comfortably reach halfway to her toes. The added stretch will evolve with time and practice. We set small goals to slowly progress to the next level. Is this easy? No. Is there still frustration? Most likely! But at least this learning experience is a start in developing patience and self-acceptance. When we are less hurried and impatient with ourselves maybe we can then be less hurried and impatient with others. We become calm. We are more focused and tolerant. We see our goals as possible. We persevere.

“Patience is being like the ocean, slowly taking back the sand on the beach. It is in no hurry, because it knows eventually it will gain, or regain what it desires.” – Brian Martin


Change your life… and the world — as a Certified YogaKids Teacher!

Vegan Pumpkin Soup

Vegan Pumpkin SoupVegan Pumpkin Soup

You’ll need a cookie sheet, a food processor or immersion blender (OR a good hand-masher and some patience), a soup pot, and an oven for this soup. You’ll also need an adult to help with cutting, baking, and cooking on the stove top!

Ingredients

  • 2 cups veggie stock
  • 2 pie pumpkins (2lb or less each)
  • 2 Tablespoons olive oil
  • 2 Tablespoons curry powder (you can substitute half or all curry powder with Seven Spice powder – I do half and half)
  • 1 bunch scallions
  • 1 cup coconut milk + 2T for garnish
  • Salt to taste
  • Roasted pumpkin seeds
  • Chopped parsley garnish optional

Preheat your oven to 350F.

Cut the tops off the pie pumpkins and scoop out the seeds and strings. Try not to scoop out solid flesh. Roast the pumpkins (top included) for 45 minutes. Remove and let cool, then carefully scoop soft meat out of pumpkin, taking care not to puncture the skin if you want to use the pumpkin as a bowl.

Add chopped scallions, spices, and olive oil to a saucepan or cooking pot and stir over medium heat until spices are fragrant, then add vegetable stock and ½ of the pumpkin flesh (all the flesh from one pumpkin).

Bring to a boil, then turn heat off. Allow to cool a little, then use immersion blender to puree. If you’re using a food processor, you need to let it cool down a lot before pureeing. You can also use a potato masher to squash all the squash, if you want your soup chunkier and more stew-like.

Add the rest of the pumpkin (cut into bite sized pieces), bring the soup to a boil again, turn down to simmer for 5 minutes, turn off heat, add coconut milk. Garnish with parsley, roasted pumpkin seeds, and a dollop of coconut milk.

To make the pumpkin seeds: Take all the pumpkin meat and gooey strings away until the seeds are mostly clean. Put them in a colander and run water over them, stirring them with your hands until all the pumpkin flesh is rinsed away. Pat them with a paper towel and spread them out on a cookie sheet to dry completely, then toss in a little olive oil (about 1 Tablespoon) and season with 1 teaspoon salt and your choice of other seasonings. I like to use spicy seasoning, like smoked paprika and Aleppo hot chili, but you can use whatever you like! Spread the seeds out again on the cookie sheet so they are in a single layer, and bake at 250F while you’re making the soup. Bake until seeds start to turn golden and are as crispy as you want them.

This recipe sounds like a lot of work, but it’s actually very easy. It’s a good teamwork exercise and looks fancy-pantsy for the holidays! If you’re not in a curry mood or don’t like spicy food, you could use nutmeg, sage, or other fragrant spices to season your soup.

While I was making this soup, I also cut my white fairtytale pumpkin (also called Ghost or Lumina) into slices and roasted it, too, so I can puree the roasted quash in a food processor and use it for my holiday breads and pies. Look at this beautiful pumpkin: white on the outside and pretty orange on the outside!


Squash is Awesome

Squash is used mostly by cooks as a vegetable because it goes well with savory spices – meaning, flavors that make up salty or spicy dishes, instead of sweet dishes. If you’ve ever had pumpkin pie or zucchini bread, you will know how sweet and tasty squash can be as a dessert, too! It is classified as a fruit because the seeds are inside. Vegetables are all the other parts of the plant, like stems, roots, and leaves.

Squashes include winter and summer squash, and gourds. Did you know that all the parts of the squash plant are edible? That’s awesome! Tender shoots and leaves can be cooked into soups and stir fry dishes, as well as the blossoms (which are delicious battered and deep fried, or tossed in a little oil and seasoning and pan fried).

Summer squash types include zucchini, yellow (or summer) squash, and pattypan squash. These types of squash have a very thin skin and don’t last for more than a week or so after you’ve removed them from the vine.

Winter squash types include pumpkin, butternut squash, Delicata squash, and lots more. You can tell a winter squash from a summer squash because winter squash has a very thick, tough, inedible rind (or shell) on the outside. Decorative gourds fall into this group, though they are not always edible – some calabash varieties are poisonous in high concentrations (meaning, if you eat a large amount). While you can technically eat most of the decorative gourds you see in the grocery store, their flesh is very bitter, so we usually use them for fall decorations or crafts that involve allowing the middle of the gourd to dry out and using the hollow shell for anything from shakers (like a maraca), to birdhouses, to bowls and carrying baskets. With gourds and many other plants, that bitter taste is often nature’s way of saying, “you should avoid eating me.”

The word “squash” comes from the Massachuset (a tribe of people indigenous to North America) word askutasquash. Most squash originated in South and Central America, where it was then spread by human and animal migration to other continents, including North America. Calabash gourds, which are sometimes hollow, originated in Africa, and scientists believe they spread not only through migration, but also by hollow gourds full of seeds floating across the ocean. That is a long journey! If you look on a map and find East Africa, then find your house, how many miles would a gourd have to travel to get from its original home to you?

Summer squash grow all summer long and are plucked from their vines as they ripen through the whole summer. Winter squash also grow in the spring and summer seasons, but the biggest harvest comes in the fall. The reason they are called winter squash is because their rinds are so durable that, if they are not damaged or punctured, you can keep them all winter long! Squash become more bitter the longer they sit, though, so if you’re cooking with them you’ll want to do it soon after you buy or harvest them.

I used folded note cards to label the winter squash I have — but not just because I needed something to write on. If you’re cooking with winter squash and want to save seeds for your garden, you can label them, use tape to enclose the dried seeds in the paper, and store them in a cool (not freezing) place until you’re ready to plant them. If you have a patch of dirt or a nice big pot that isn’t occupied, try growing some of these yourself, and experiment with all the fun and tastiness squash has to offer!