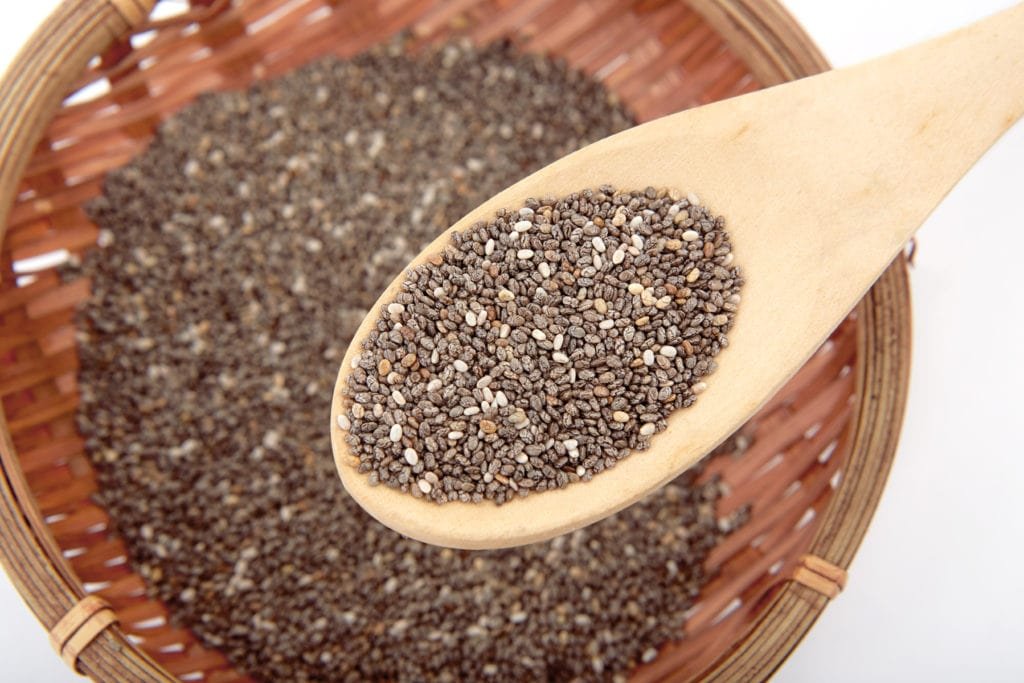
Chia seeds (chia hispanica) are amazing and nutritious. The originate in Mexico, where they have been cultivated for centuries. In fact, Aztec warriors used to carry chia seeds with them when they went into battle, and they were sometimes referred to as “runners food” because, it was said, eating just a small amount of these tiny, lightweight seeds could sustain the scout runners and warriors for an entire day. A chia seed can also hold up to TEN TIMES its weight in water! You’ll see how holding onto so much water gives the shell a slippery gel coating that allows us to make recipes like chia pudding. It also helps YOU stay hydrated (which means you have enough water in your body) because that gel coating of water and electrolytes is released slowly, as they make the journey through your digestive tract.
 Today, scientists have discovered that chia is good for: balancing insulin levels and helping prevent diabetes, burning fat and providing loads of essential fatty acids, vitamins, nutrients, and fiber. They’re good for your guts, bones, skin, and brain!
Let’s do some warrior poses and eat some tasty chia treats!
Chia Fresca
In Mexico, chia fresca is made of fruit juices combined with chia to make a gelatinous, cooling drink for summer. It’s typically made with lemonade, but all kinds of juices can be used! Let’s make a pitcher of chia fresca. It’s both filling and light, which makes it a perfect drink-snack for hot summer days.
 Chia con Limonada (chia with lemonade)
(Makes one pitcher, or four glasses)
- 48 oz cool water
- 4 large lemons
- 1/4 c of sugar (or sweetened to taste with your favorite sweetener)
- 2 Tablespoons of dry chia seed
(a single glass)
- 12 oz water
- 3 teaspoons lemon juice (about 1 lemon)
- 1 teaspoon dry chia seed
- 2 teaspoons sugar (or sweeten to taste with your favorite sweetener)
Note: If you’re using a type of juice that is already sweet or sweetened, you do not need to add any additional sugar
Stir all the ingredients together except the chia and make sure the sugar or sweetener is dissolved in the water. Add the chia seeds and allow the chia drink time to gel in the refrigerator. You will need to wait at least 4-6 hours for the chia to gel. You can make it before you go to bed and leave it to fully gel overnight. This lasts about five days in the fridge (but you’ll probably drink it all up before that!).
Chia Pudding
Chia pudding can be made into lots of flavors, using a variety of ingredients.
What you need, per serving of pudding:
- 1 cup of a creamy ingredient, like milk, almond milk, coconut milk, etc.
- 3 Tablespoon of dry chia seeds
- fruit juice, cocoa powder, or extract (like vanilla extract) for flavoring
- Sweetener, as needed (Sugar, honey, agave syrup, stevia, etc.)
- Optional: nuts and cut up, fresh (or frozen) fruit, shredded coconut, flax meal — for extra texture and flavor
You may also like this a little thicker, to make it extra pudding-like; or thinner, so you can drink it. You can add extra chia seeds to thicken it, and fewer chia seeds to make it thinner.
Mix all the ingredients well, and then add the chia seeds and shake or stir them in as much as you can. It’s helpful to put each serving, if possible, into a 1/2 pint jar with a lid so you can shake it up halfway through the gelling process. This keeps the chia seeds from settling to the bottom and clumping into a hard mass. Usually if you can shake it up a few times during the first hour and a half, it won’t clump, even if you leave it to fully gel overnight. I like to make this at bedtime so it’s ready for breakfast!
If you want to blend fresh fruit into your pudding so the whole pudding is flavored (versus using pieces of cut fruit), put all the ingredients into a blender – EXCEPT the chia seeds (this is important; they will not gel if the seed coating is broken) – and puree, adding the chia seeds to the blended mixture right before it gets sent to the fridge.
Follow these basic directions for all the recipes below. Lasts for about 4 days in the fridge.
Chocolate Chia Pudding
- Coconut milk
- 1 1/2 T cocoa powder
- 2 Tablespoons sugar
Horchata Chia Pudding
- Rice milk
- 1/2 teaspoon vanilla extract
- 1/2 tsp ground cinnamon
Vanilla Chia Pudding
- Any creamy base “milk”
- A little sweetener
- 1/2 teaspoon extract
Fruity Chia Pudding
- Use 1/3 cup of berries (blueberries, strawberries, raspberries), or 1/2 large banana, or 1/4 c fruit juice
- Use only 3/4 cup of creamy base
- Sweeten if needed
Use a blender to blend chunky fruits and base mixture together before adding chia and refrigerating.
Be creative! What delicious flavor combinations can you come up with?
Math Medley
Using the one-serving size as your starting point, how much of each of the ingredients would you need to make enough servings for your family? Or for each morning of your school week (five)?
Laughing Language
Since chia fresca is a Mexican creation, can you learn to say all the ingredients of your chia treats in Spanish? Here are a few to get you started:
-
- Milk – leche
- Fruit – frutas
- Lemon – limón
- Strawberry – fresa
- Vanilla – vainilla
What else are you using in your favorite chia recipe?
Ecological Echoes
Chia is one of over 3500 species of plants belong to the mint family — called Lamiaceae. All members of this family of plants have simple leaves that are directly opposite of each other on square stems, with five-petaled flowers that are fused into what looks like a single upper petal and one lower petal. All members of the mint family may not be tasty, but they are all edible. Some other members of the mint family include peppermint, spearmint, basil, lavender, marjoram, rosemary, savory, and thyme. Different types of mint grow all over the world…can you identify any wild mint plants in your local wildlife area?